Block 23 – Billie’s Sampler
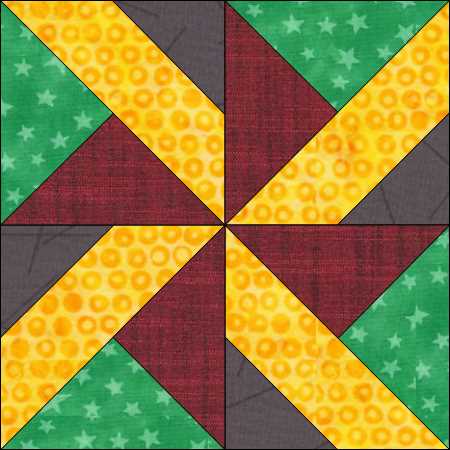
This was a quick easy block. I again chose to paper piece, as I wanted all my points and colors to be perfect. It is basically I simple 4 patch which I paper pieced each sub block. The sub blocks are all the same except for the direction in which they are turned into the block, creating the windmill effect.
Cutting
Above is the cutting instructions . The Foundation Paper Piecing templates. However if you choose to piece using traditional methods the last document is the actual templates that can be used.
This block has a weird cutting instructions. I just cut half square triangles to convert
2 x 3 7/8 x 3 7/8 inch square (I cut mine 4 1/2″) cut into half square triangles (HSTs). 2 squares second color (gray in the example) or 4 HSTs
4 x 5 1/8 x 5 1/8 inch square (cut mine 6″) cut into HSTs. 2 square color 3 and 2 squares color 4, should be 4 HSTs each color for a total of 8 HSTs
2 x 3 1/2″ strip Width of Fabric (WOF) (I used Fat Quarters (FQs)) this is background fabric (Yellow in example)
Assembly
All the HSTs have been cut out
Using Seam Align Glue to secure the first triangle which was orange. I then added the second triangle red secure seam with Seam align glue, then stitched using 150wt Saba from Amann Mettler with a 1.8mm straight stitch. Note: I made all 4 sub blocks at one time exactly the same
after pressing the second triangle into place, I secured my background strip to the long edge .
and finally adding the smaller corner HST to the sub block.
Now trim the 4 sub blocks on the cutting line.
with the 4 complete sub blocks arrange them in proper order and assemble as a standard 4 patch block.
Success your 23 Block Windmill Variation is complete only one more block in the Billie’s Sampler wow can’t believe we made it this far.

