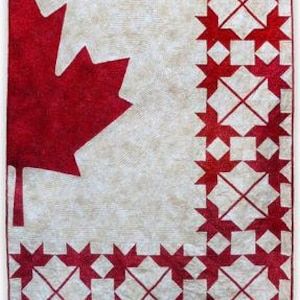
Want to wish all my #Candian friends a #Happy #Safe #CanadaDay
#Quilt – Strong and Free – by #PaulLeger.
#PatchWork #Piecing #quilting #Canada
Quilting On A Budget
Want to wish all my #Candian friends a #Happy #Safe #CanadaDay
#Quilt – Strong and Free – by #PaulLeger.
#PatchWork #Piecing #quilting #Canada
Only the mob and the elite can be attracted by the momentum of totalitarianism itself. The masses have to be won by propaganda.
#HannahArendt #FridayQuote
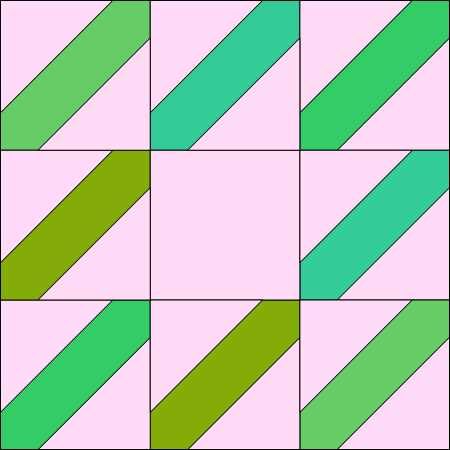
#QuiltBlock – Tangled Garter – 1754 in #encyclopediaofpiecedquiltpatterns by #BarbaraBrackman
#PatchWork #piecing #GridPattern #GridPiecing #gridpatchwork #GridQuilting #Quilt #quilting

Propaganda does not deceive people; it merely helps them to deceive themselves.
#EricHoffer #FridayQuote
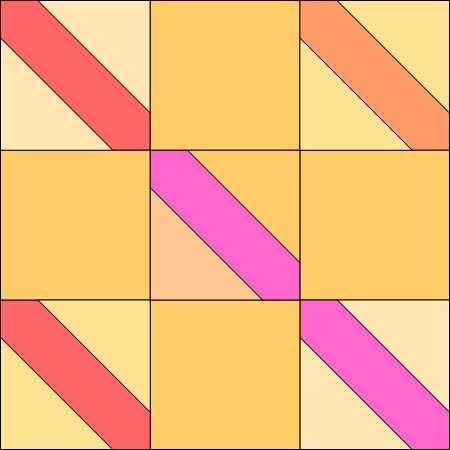
#QuiltBlock – East of Eden – 1752 in #encyclopediaofpiecedquiltpatterns by #BarbaraBrackman
#PatchWork #Piecing #GridPiecing #GridPatchwork #GridQuilting #Quilt #Quilting #QuiltPattern #Pattern #GridPattern

In time of war, truth is always replaced by propaganda.
#CharlesLindbergh #FridayQuote
#QuiltBlock – NonSuch – 1751 in #encyclopediaofpiecedquiltpatterns by #BarbaraBrackman
#PatchWork #Piecing #GridPiecing #GridPatchwork #GridQuilting #QuiltPattern #Quilt #Quilting
The world breaks everyone, and afterward, some are strong at the broken places.
#ErnestHemingway #FridayQuote
#QuiltBlock – Broken Plates – 1750 in #encyclopediaofpiecedquiltpatterns by #BarbaraBrackman
#PatchWork #Piecing #GridPiecing #GridPatchwork #GridQuilting #Quilt #Quilting
What is tolerance? It is the consequence of humanity. We are all formed of frailty and error; let us pardon reciprocally each other’s folly – that is the first law of nature.
#Voltaire #FridayQuote
#QuiltBlock – Mississippi – 1749 I. #encyclopediaofpiecedquiltpatterns by #BarbaraBrackman
#Patchwork #Piecing #GridPatchwork #GridPiecing #GridQuilting #Quilt #Quilting
I believe that unarmed truth and unconditional love will have the final word in reality. This is why right, temporarily defeated, is stronger than evil triumphant.
#MartinLutherKingJr #FridayQuote

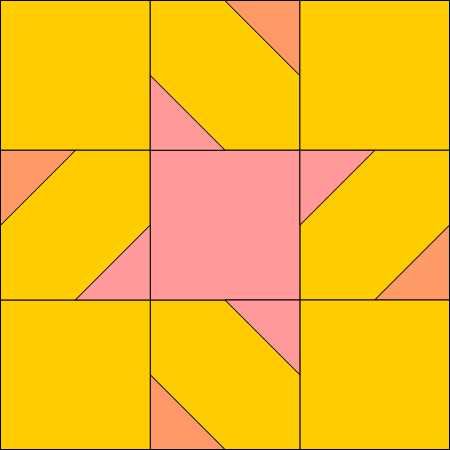
#QuiltBlock – Texas Treasure – 1748 in #encyclopediaofpiecedquiltpatterns by #BarbaraBrackman
#Patchwork #Piecing #GridPiecing #GridPatchwork #GridQuilting #Quilt #Quilting
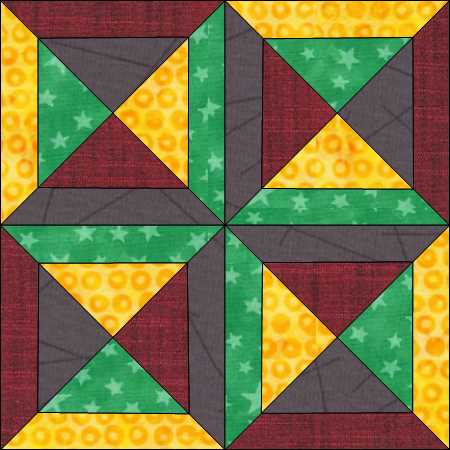
Framed Square – Block 12 Billie’s Sampler. Unique but simple. There are several ways to make this block. I chose to Foundation Paper Piece (FPP), wanting to get all the miter angles to align perfectly. Another way is to use simple Quarter Square Triangles (QSTs) with sashing. You can add sashing without the miter. or the with the miter the choice is up to you. this block is 12 1/2 x 12 1/2″ with 4 x 6 1/2″ sub blocks.
The sizes are exact. No room for any mistake or complication. Because I FPP i cut my pieces a little big. (Note: Need to learn to check the round to 1/8″ in the printing with Electric Quilt 8). Cutting HSTs should be 3 3/4″ square, QSTs should be 5 1/4″ and the strips should be 1 1/2 x 7 1/4″
Templates for perfect piecing
Print four copies. each side should measure 6 1/2″.
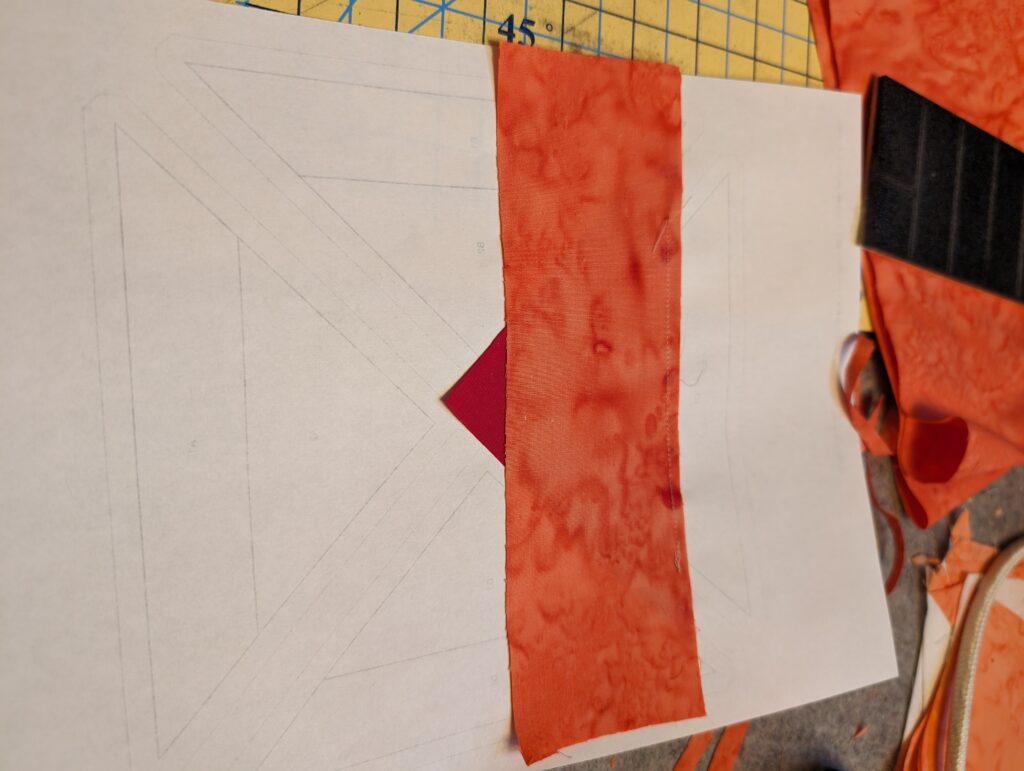
secure center QST to FPP template. add 2 1/2″ strip . stitch on line, I used a 1.8mm straight stitch using 150wt core-spun polyester thread (Amann Metter Saba)
Press open to the strip side. I used Acorn Easy Pressing solution pen for flat seams
Trim the QST pieces on the dotted cut line.
Repeat, there should be 4 sets of QSTs.
Assembly as 4 patch, be cautious to match all the seams and corners.
Finish assembling your QSTs into squares. 6 1/2 x 6 1/2″ Using magic pins (note these pins bend easily), Acorn seam align glue each piece was perfectly secure for stitching.
Assemble the 4 x 6 1/2 x 6 1/2″ sub blocks into a single 4 patch 12 1/2 x 12 1/2″ block.
Success! Block 12 Billie’s Sampler is complete, and double you have now completed 1/2 of the 24 blocks in the project. Congratulations.
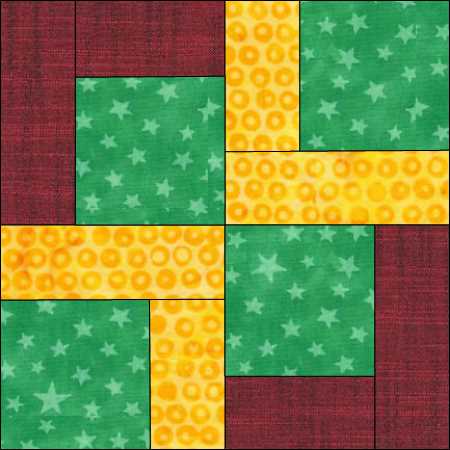
Patience Corner is a simple pieced block I also made a Foundation Paper Piecing template, in the case you wanted to be positive your lines are perfectly straight. I used 3 colors in this block. This block again finished at 12 1/2 x 12 1/2 inches
There are some weird cutting instructions. I am currently learning the difficulty of Electric Quilt 8 However, the cutting instructions are simple
This is the Foundation Paper Piecing templates. I did not use this as this is a simple strip piecing.
Stitch a 2 1/2 x 4 1/2 inch rectangle strip to each of your 4 x 4 1/2 x 4 1/2″ square. Press to the strip side. Next stitch the 2 1/2 x 6 1/2 rectangle strip to each of your now 4 1/2 x 6 1/2″ units Press to the strip side
Note: I used Solid Batiks. if directional fabric is selected then caution must be taken to make sure the strips and square are in the proper placement. Use grid in the cutting instructions.
Assemble the four 6 1/2 x 6 1/2 units together as a 4 Patch unit. Taking note the direction of your colored strips.
Success! Patience Corner Block 11 of the Billie Sampler is complete. What a fun and simple block.
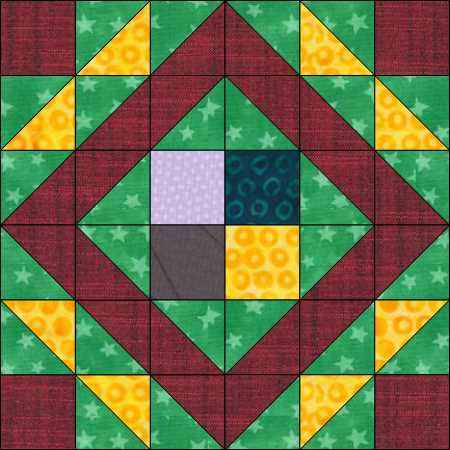
An old block made from Half Square Triangles (HSTs) and Square sub blocks. This block will be 12×12″ finished. Using 2″ finished sub blocks. Garden Path can be assembled two different ways. The most used would be a simple Nine Patch configeration which leads to 4 main Blocks. Or a Four Patch configeration which leads to a 9 main blocks. The choice is yours, depending on which configuration you are more comfortable with.
Again I used the fabric from my Anthology Fat Quarter bundle Loveable and Maywood Dragonfly White as my background fabric
All the squares are cut.
mark the back of the 10 x 4″ background squares to create 14 x HSTs. And add your 10 x Path Color and the 4 secondary color squares. Use your preferred method. I choose to mark my actual stitch lines. You can also draw one line from corner to corner and stitch a 1/4″ on both sides of the line.
stitch the HST lines. I use a 1.8mm stitch length using 150 weight corespun polyester thread. This aliminates any bulk in the seams. My preferred thread is Saba from Amann Mettler
with all your squares stitched corner to corner, it is time to cut each square in half between the 2 stitching lines. This will create a total of 28 HSTs. Pressing each HST open, I choose to press to the darker fabric. Now using a Martelli 2 1/2″ square template trim all 28 HSTs. You do this by aligning 2 opposite corners of the template with the seam of the HST.
Note: you can use any method to make your HSTs. The choice is yours. You need 28 x 2 1/2″ HSTs. I choose make the HSTs larger and trim down as this elimates any non perfect seams, or stretched bias from heavy pressing etc.
Using 4 x 2 1/2″ squares lets assemble the center Four Patch Unit
Now with caution and patience lets assemble the remaining blocks. Starting with sets of 2. working from the grid layout in the cutting instructions and using your color choices. You should have 32 units ready for stitching using 1/4″ seam allowance. this excludes the center 4 patch we created earlier.
Pressing your seams to the darker fabric. next round assemble the 2 patch units into 4 patch units. Again taking care to match the grid in the cutting instructions. You want to the path around the center 4 patch perfect.
Note: I choose to make my blocks into sub 4 patch units and assemble the final unit as a 9 patch.
Success! Garden Patch Block 10 of the Billie’s Sampler is complete. You should have a 12 1/2 x 12 1/2″ block.
© 2026 Quilting On A Budget
Theme by Anders Noren — Up ↑

