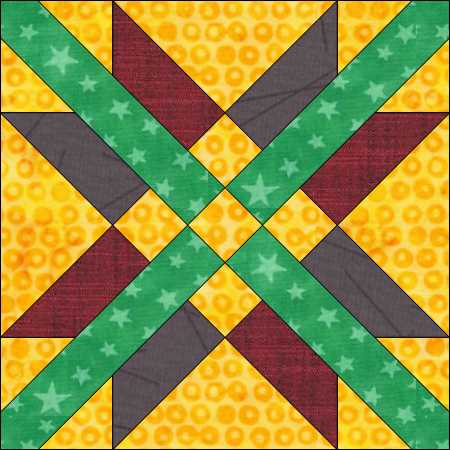
Mexican Star Block 21 looks simple, but is more complicated than it looks. as the corner strips continue into the center Nine Patch. I tried to make it as a large nine patch but couldn’t work it out because of angles. Therefore, again ended up paper piecing.
Cutting
4 x 2 7/8 x 2 7/8″ square background fabric, cut into Half Square Triangles (HSTs), since paper piecing I cut mine larger. Again rounding to nearest 1/2 plus adding 1/2″ so cut 4 squares 3 1/2″ cut into HSTs
5 x 1 15/16 x 1 15/16 square background fabric. paper piecing cut 2 1/2″ squares
1 x 7 3/16 x 7 3/16″ square background fabric. cut into Quarter Square Triangles (QSTs). paper piecing size 8″ square cut into QSTs
8 x 1 15/16 x 5 1/8″ strips of second and third color. again paper piecing cut 8 strips 2 1/2 x 6″ strips 4 of second color and 4 third color
4 x strips 3″ x 10″ , I cut the strips from a fat quarter narrow width. 18″ Note: there is a error in the cutting instructions from Electric quilt. For some reason it ignored Fabric A .
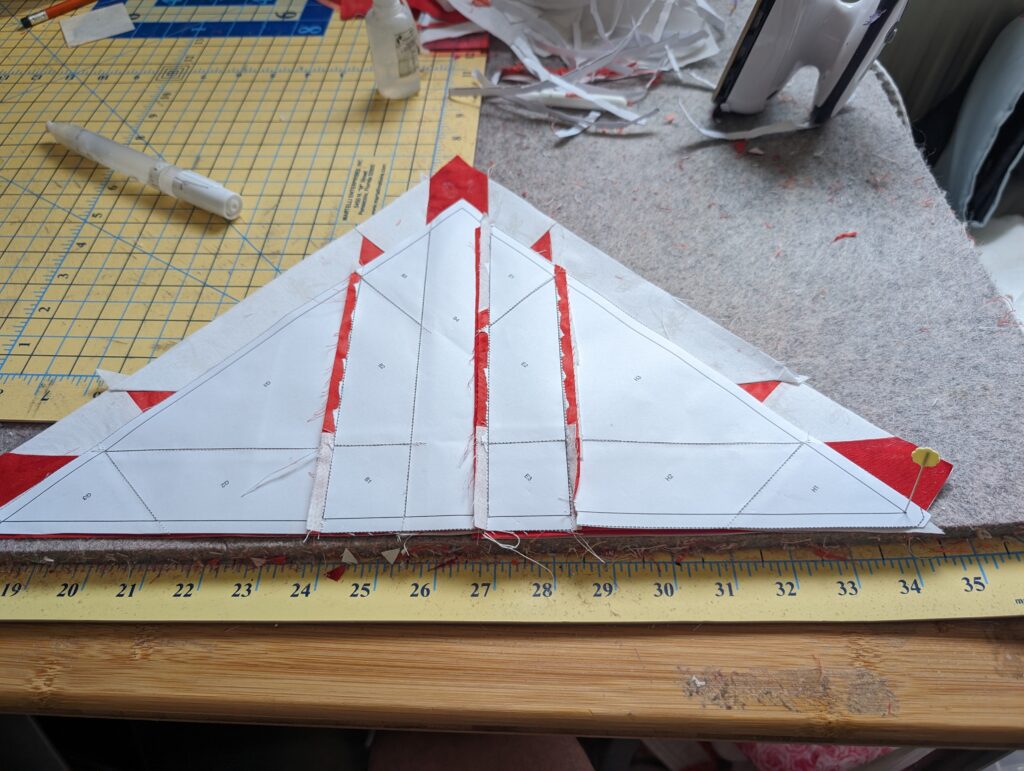
Above are the templates for the block if you choose to use traditional piecing methods.
Assembly
using traditional paper piecing methods with seam align glue to secure starting pieces.
after finishing all the individual pieces. it is time to assemble the block.
wow congratulations. Block 21 – Mexican Star. This block went together rather quickly since I paper pieced it. I tried traditional piecing methods but it failed. Paper Piecing really make this block a great deal easier to assemble.
This feather design is very traditional I made the design in a 8″ and 6″ format. I included the master EMB file so that it can be adjust to the user specification. Also included EXP, JEF, VP3, and PES formats.
What is tolerance? It is the consequence of humanity. We are all formed of frailty and error; let us pardon reciprocally each other’s folly – that is the first law of nature.
New Topic, I have been experimenting with using my embroidery machine for quilting. I created this butterfly quilt design from a coloring book. I really like the simplicity.
In this baby quilt I am working on, I used a 28 wt Cotton thread, with 3mm stitches.
In the zip I have included the EMB master files for a 8″ and 6″ design. Also included machine files for Janome JEF, Bernina EXP, Brother/Babylock PES and Husquvarna Viking/Pfaff VP3.
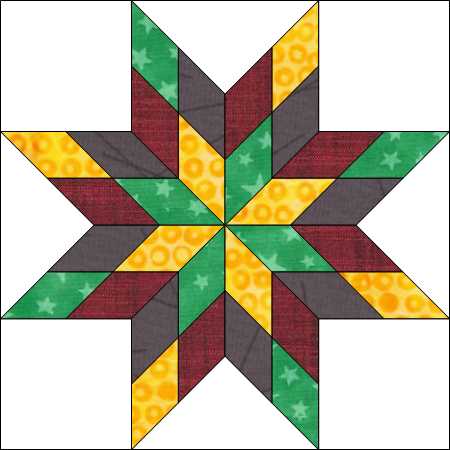
I always knew this block as Blazing Star. There are many names some would call it a mini Lone Star etc. But the book says it is a Morning Star, so that is what we will use.
Cutting
36 x 2 1/2 x 1 3/4 inch 45 degree diamonds. This is 8 diamonds of each of your chosen 4 colors If you choose 3 colors then one color you will need 16 diamonds.
4 x 4 x4 inch squares for the corners of this block using your background fabric.
1 x 6 3/16 x 6 3/16 I cut my square at 6 1/2 x 6 1/2 and trimmed after stitching into the block. However cut your large square into quarter square triangles (QSTs). there should be 4 equal triangles.
I was going to piece my block the old fashioned way, like you would assemble if you were hand piecing. This didn’t work. Also had major issues cutting accurate 45 degree diamonds. So I eventual broke down and paper pieced this block. There are many little nuances and notes about paper piecing all these diamonds. I will explain as the block develops.
I originally cut my 45 degree diamonds using the markings on my cutting mat. eventually realized the diamonds were 45 degrees but not the correct size
Using seam align glue. I stitched my center diamonds in pairs to create a 8 pointed star, or Lamoyne Star.
Again using seam align glue I stitched the 4 pairs into a set of 2 pairs with 4 diamonds each.
Then I stitched the 2 half’s into a single 8 pointed star block.
When I tried to add the next row of 45 degree diamonds, using Y seams This failed miserably with the sewing machine. I either had a hole at the intersection or a pucker. This would have been so easy nudging and smashing if using a needle and thread and your hands. So I broke down and decided to just paper piece.
now when I started looking at my diamonds i really noticed how off they were compared to the paper piecing shapes. But lucky each diamond was too large and worked with paper piecing so I didn’t have to recut my diamonds.
with all your colors diamonds laid out you are ready to start paper piecing.
The paper piecing units are in sub blocks of 2 diamonds. Take notice that these blocks are directional and need to take extra caution in the direction you assemble your color diamonds and there is a top and bottom of each sub block.
now that stitching each of the sub blocks into the next level sub block of 4 diamonds making a larger diamond. the assembly is simple like i showed originally. stitch in pairs and then stitch again in pairs and then stitch the 2 half together.
The notice is how the seam lines and colors interact to keep them all going the correct direction I warn that you must take caution when assembling the sub blocks. I had to remove several of my diamonds to put them in the correct arrangement so the colors and seams all align properly.
You star is complete. Now we must add the background squares and QSTs to finish the block off
I marked each point in the block with a pencil showing where the 1/4″ seam was. Also marking 1/4″ on the background squares and triangles so the points can be accurately matched. As you must use Y and partial seams for this step . Also the seams must end exactly at the 1/4″ mark or you get a pucker. if the seam is too short then you get a hole.
after marking the 1/4′ mark in the points using seam align glue I added my corners and middle triangles.
The photo of the finished block is before I trimmed. You will notice the extra fabric in the middle triangles where I cut my large square a little to larger before making into QSTs. and you can also notice some of the pencil marks added so that my seams were accurate. I use true graphite #2 pencils The graphite will brush off and will definitely wash out. Be cautious many modern pencils use polymers mixed with the graphite. These polymers are difficult to remove. So I avoid them.
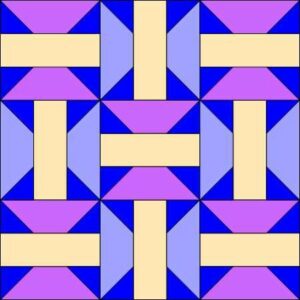
Card Trick Block 20 Billie’s Sampler. This is a interesting block. I paper pieced this block to keep my colors and point accurate.
Cutting
Follow the cutting, it is very unique as you need so many different triangles, I cut my blocks to make the triangles rounded to nearest 1/2″ plus 1/2″ for overlap. There is also Part 1 and Part 2 of the paper piecing pattern. This is so that it fits on A4 or Letter size paper. each paper piecing template should be 4 1/2 inches wide.
I used my Martelli Templates to cut my squares to make my triangles. Some are Half Square and others are Quarter Square. i used the 5.5 inch template for the Half Square Triangles and 6.5 template for the quarter square triangle.
using standard paper piecing techniques assemble your block. it goes together really quickly.
Wow we just finished Block 20 Billie’s Sampler Card Trick. Almost to the finish line
Bridal Wreath is a applique block. I would have loved to turn the edges. But age and limitation can no longer turn the edges on small shapes. Therefore, using raw edge techniques. This was a fun block.
Cutting
1 x 12 1/2 x 12 1/2″ inch block background fabric
scaps for various shapes. 8 hearts, 20 leaves and a bias band for the wreath ring.
The PDF are the templates to make the block Bridle Wreath
Assembly
Using templates and scraps I cut all the individual pieces out on the stitch line as I used raw edge techniques. however if you are able to turn the edges I included cut and stitch lines.
I looked at using a satin stitch or bias strips to make the wreath ring. I choose bias. I cut my fabric on the bias and double fold. I cut a 1″ inch strip then folded both sides to the center which gives you 1/2″ strip then fold in half again for a 1/4″ bias strip.
using the large circle template and temporarily securing to the center of the 12 1/2″ square background fabric. I placed the bias strip I made around the edge of the circle. I used my Elmer’s purple glue stick. slowly apply the strip around the edge.
the bias ring can be treated at turned edge applique. So I again used the Shelly Tobasche Method. using a modified 0.8mm x 1.0 mm long Balance +20 modified Blanket Stitch. Stitching around the outside and inside of the ring. Remove the center circle template.
Gluing the leaves down around the center ring. ( note: Hind sight i would have added the hearts first) I stitched the leaves using a standard blanket stitch 1.5 mm x 1.5 mm.
adding and stitching the hearts using the same 1.5 mm x 1.5 mm blanket stitch.
Success Block 19 Billie’s Sampler Bridal Wreath is finished. I really enjoyed the applique.
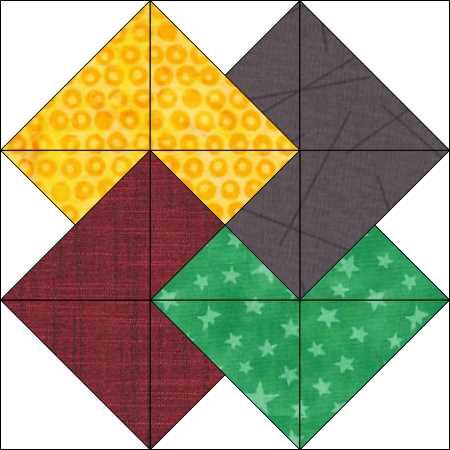
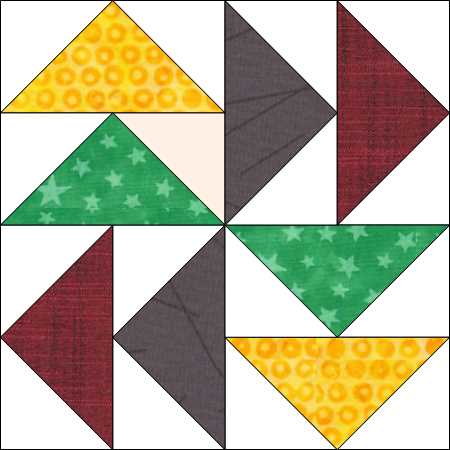
Dutchman’s Puzzle Block 18 Billie’s Sampler. This is a simple fun fast block. There are so so many ways to make Flying Geese sub blocks. However, I paper pieced mine. As I wanted my point to be perfect and accurate.
Cutting
8 x 3 7/8 x 3 7/8″ squares of background fabric. Cut all 8 squares into Half Square Triangles. (Note: I cut my square 4 1/2 inches)
2 x 7 3/16 x 7 3/16″ squares, cut both squares into Quarter Square Triangles (QSTs) (Note: I cut my squares 8 1/2 inchs. and only used 2 colors. Therefore, only needed 2 squares as you only need 8 QSTs for this block. if you choose to use more colors then adjust accordingly.)
I found it much easier and faster to simply paper piece. You will need 4 of these paper piecing templates and while printing each should measure 6 1/2″ square.
Assembly
Using seam align glue. Start with a QST and secure. then add a HST on each side using standard paper piecing methods. since I cut my pieces a little too large then alignment was fast and easy. then proceed to the QST 2. Now repeast for the 4 units.
now that all 4 units are complete, Trim on the cutting lines of your paper piecing templates.
Using standard methods assemble as a 4 patch Note of caution to keep your pieces turned correctly to form the puzzle design.
Congrats – Block 18 Dutchman’s Puzzle is now complete.