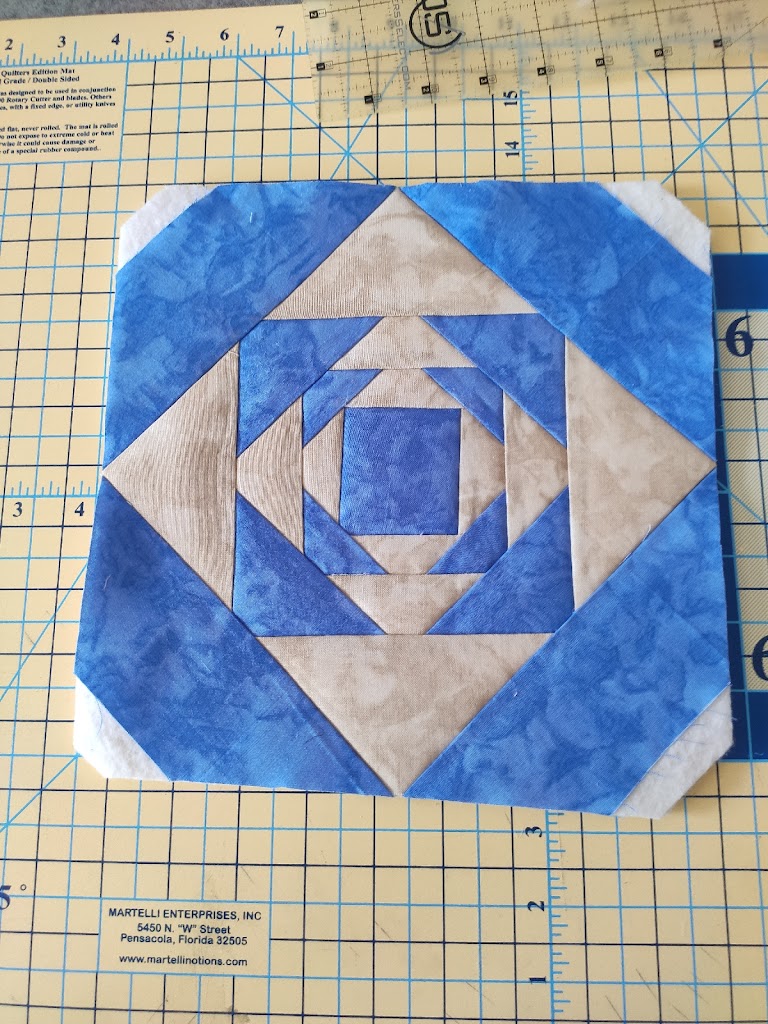
Quilting On A Budget

Category: Techniques

tools and Techniques, how to use

Grid Based Patchwork

Drafting Your Own Quilt Patterns

Beginning

I have used this method all my life.  Many wonderful quilt designers use this simple method.  You do not need line by line instructions.  You just need to see or find the underlying grid in the quilt block design.  With this method you can also easily alter size of each complete block by simple changing the underlying sub blocks or squares in the grid.  This makes the math easy.  Remember Quilting is Repeat Repeat and Repeat again.  This method also allows you to decide what size sub blocks or squares you prefer.  Many love 2 inch finished blocks   I actually prefer 3 inch finished blocks.  The quilters I if follow and typically get inspiration usually work with 1 inch sub blocks or squares.  But the sky is the limit

When we draft or use a pre-drafted quilt block design.  The size stated is always finished size of the complete block.  So you must always add another ½” to each block and or sub blocks to account for seam allowance (assuming the standard ¼ inch seam allowance used in quilt patchwork).  

Categories

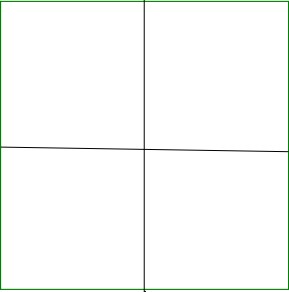
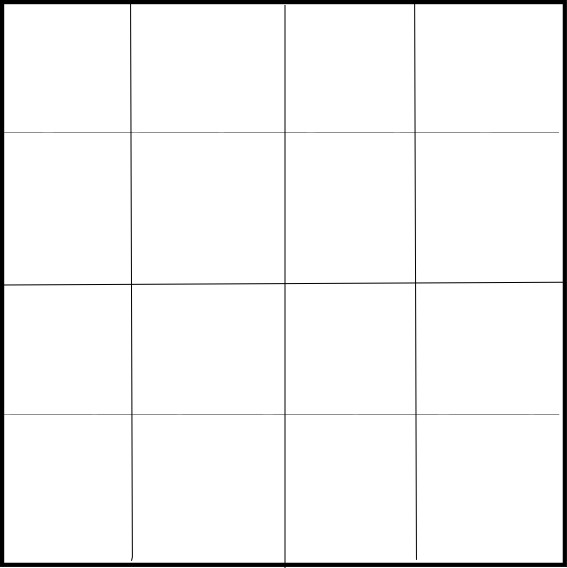
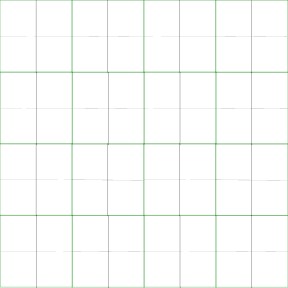
Let me take a moment to explain the Grid systems that is used in drafting a quilt design.  Most geometric quilt designs used in patchwork fall into a few categories.  These categories are essentially squares divided into smaller squares.  These smaller squares form a grid of 4, 6, 9, 16, 25, 36, 49 and 64 smaller squares.   These Grids usually work in multiple simple Four Patch (4, 16, 36, and 64 smaller squares) and the Nine Patch (9, 36 smaller squares).  But we can also have a combination which uses 25 and 49 squares.    These are just the most common.  But a patchwork block can be made of any number of smaller blocks, and they do not have to be square.  You can also make rectangle block.

Note:  ther e is another group of blocks, which will be covered in a separate post, that are not based on squares.  These blocks are based on lines radiating from the center of the block in equal distances to the edge of the square.  This is the foundation of an eight-pointed star grid. 

Drafting

The secret to drafting a pattern is to recognize which grid your designs align.  And secondly getting the grid to fit the desired finished block size.  Lines of the grid in a design are not always visible.  And many grid based designs have no squares at all in the design.  You must superimpose a grid over the design in your mind. 

Your ability to recognize these categories for designs I share is easier since the designs have the grid overlaid onto the block design.  Even though the grid is overlaid many may find it difficult to draft the design.  You can simply print several copies of your proposed design and then draw the grid lines until you find one that easily overlays or works with the design.

The grids are grouped into 4 separate categories.  A design with a grid based on 4, 16, 64 are based on smaller four patch units.  Those with 9 and 36 squares are based on Nine Patch units.  (however, 36 squares can also be broken into 4 patch units, use which works best for you).  The block design based on 25 smaller squares is based on 5 patch units and 49 smaller squares are based on the 7 Patch unit. 

Creating the Grids

The first step is to decide the finished block size you desire.  However, if your finished blocks size is not flexible, then you may be required to use odd size smaller blocks.  Example using a 9-patch based design.  If you want a 5-inch finished design, you will need to use 1 2/3 inch finished smaller blocks   then need to add ½ for your seam allowance.  See how complicated math can get.  However, if you changed your block size to 6 inches finished you will need to have 2 inch finished smaller blocks which will make your smaller or sub cuts at 2 ½ inches.  Which is significantly easier math.  This is how I make my math easier. 

4 Patch Grids


4 Squares
16 Squares
64 Squares
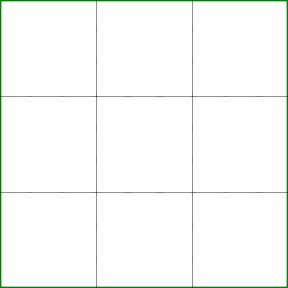
9 Patch Grids

9 Squares
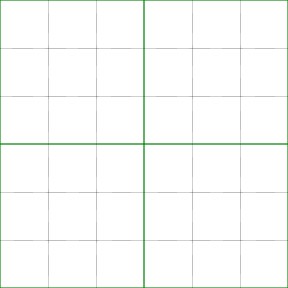
36 Squares
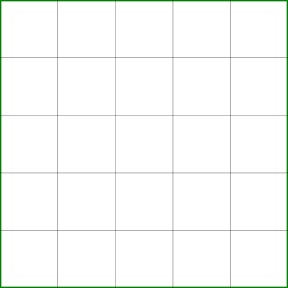
5 Patch Grid

25 Squares
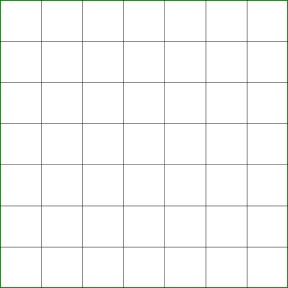
7 Patch Grid

49 Squares
Now that you understand how to divided your block design into different grids, The math becomes easier.  I personally work with individual square size and not worry about the finished size of my block.

So using 3 inch finished squares, remember you have to add ½ inch for seam allowance.  So you would actually have to cut 3 ½ inch squares.  But the math is much easier.  Using the 4 patch design, the finished bock would be 2 x 3 = 6 inches.  Or 6×6 inch finished block.  Using the 16 patch grid, then you would have 4 x 3 = 12 inches, therefore, you would end up with a 12 inch finished block.

Even with the more difficult blocks like the 49 patch block or 7 patch grid, you would get 7 x 3 = 21.  So you would complete a 21 inch square block finished. 

This method makes math so simple you just need to worry about the induvial size of each block in the grid and then complete the grid.  So the math becomes easy.  However the smaller your individual sub blocks in the grid the more difficult and precise the stitching needs to be  like if you use the 7 Patch grid and want a 7 inch finished block   you would need 1 inch finished sub blocks.  So always add your ½ inch seam allowance so all your cuts would need to be 1 ½ inches. 

Ending Thoughts

The reason I love using 3 inch finished sub blocks or squares, is working with 9 patches, usually my preferred block style.  You have options.  So if you work with 3 inch the math becomes easier.  Like if you want to add dimension to your block, using a 3 inch sub patches in your nine patch which give you a 9 inch finished block.  But you can also easily add a nine patch into one of your 3 inch Sub patches or squares which gives you a nine patch in a nine patch.  You just need 1 inch finished sub blocks.  The match is 3 / 3 = 1    so easy math

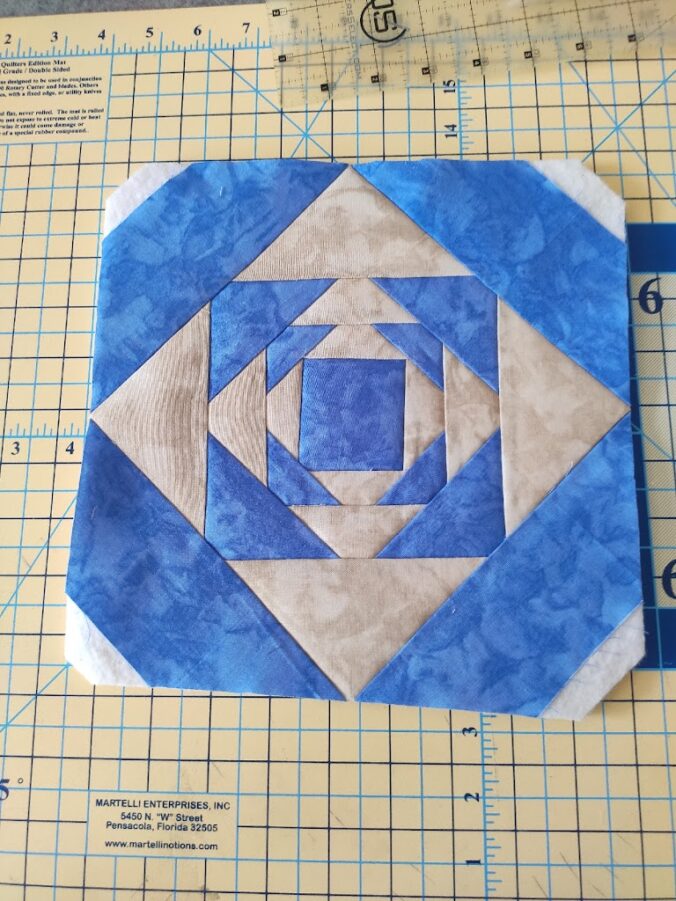
Now you can see the endless possibilities.  Each week on Friday I post a little quote and a block made from one of these grids.  You are welcome to use any of these blocks.  They are old vintage blocks with no copyright. So have fun.
Video Overview

Log Cabin

Log Cabin

The Log Cabin is probably one of the most popular quilt blocks.  The design is built around a square in the center of the block.  Piecing the Log Cabin is to use no pattern, but to build strips around the center square, cutting your strips off as you reach the edge of the center unit.  The block grows until the number of strips equal the size of the desired block.  Please note the method is not exact and it will be difficult for you to predict the finished size of the block.  What if a certain size is needed to fit a quilt or other project?  You must understand how to draft a pattern.  And could cut individual templates.  If strips are sewn on and cut off when you reach the edge of the center piece, the block is apt to get wavy around the edges and not to lay flat.

Carefully study the log cabin pattern shown, there is a square in the middle which appears to be the isolated from the rest of the block.  The square may be large or small.  The square does not have to be the same size as the logs or twice the width of the logs.  In addition to the middle square, there is almost always four logs.  Each log is parallel to one side of the square.

Log Cabin Block Pattern

For this block you will need 7 colors.  Color 1 is for the center block.  You will need three dark colors and three light colors.  This makes the traditional log cabin block.  This Block Pattern makes a 16 x 16-inch finished block.

When piecing, A2 is your center square.  Traditionally this center square is usually red but can be any color you choose, In the this block this square is 4 x 4-inch finished block, which is a square of fabric cut to 4 ½ x 4 ½ inches

All the following strips in this pattern are 2 ½ inch wide.  You may use a Jelly Roll or cut the fabric from fat quarters or yardage.

Strip A1 and A3 are your first dark color, A4 and A5 are first light color.  A6 and A7 second dark color, A8 and A9 are second light color.  A10 and A11 third dark color, A12 and A13 your final light color.

The Log Cabin is a very versatile block.  Depending on the direction you set your blocks can significantly change the look of your overall quilt.  Below you will find several examples.

Log Cabin Block

Traditional Log Cabin Quilt

Traditional Log Cabin Quilt

Light and Dark Sides set together

Log Cabin set with Light and Dark Corners Next to each other

Log Cabin Set in a Row

Log Cabin Blocks set in Rows

Let’s Talk About Thread

Amann Mettler Silk Finish 60wt (My GoTo Thread on 3000yard Cone)

Thread is an interesting discussion.  So many choices, so many types, so many fibers, so many companies.

As you read in my HV Topaz 30 review, I had huge issues with tension, and thread jumping out of the tension disks. That is the reason I decided to discuss thread.

Moreover living in Europe, the choices are different.  The big brands translate over, but the smaller brands do not even think it.

Gutermann Sew All (General Purpose Polyester)

The Big Thread Companies I am familiar with are:  Gutermann, Amann Mettler, Madeira, Aurifil, Superior Thread, YLI, Coats, ScanFil, and Fils Au Chinois.  I am sure there are many many more.

Thread Weight

In my past sewing life, when I had a project I would pick up a matching spool of what ever was on sale at the local Shop, and happily completed my project.  When I purchased my HV, an embroidery machine, things started to change. This machine forced me to look at thread weight.

Aurifil 40wt Cotton (Quilters Favorite)

Aurifil 40wt Cotton (Quilters Favorite)

I have read online or listened to my fellow quilters say some like, “you will want to use a 50 weight thread when you …”

The Higher the thread weight number the thinner the thread, confusing I know!!!

You must know weight numbers are not always clearly marked.  And many times the weight indication is a fraction, 30/2, 40/2, 50/2, 50/3, 60/2 etc.  The second number is the number of plys that make of the tread strand.  2 mean there are two pieces of thread twisted together.  More strands/plys stronger thread.

Truly understanding thread weight is not universal and only people that manufacture thread really understand the terms like Cotton Count, Denier and Tex.

There is a wonderful blog post on understanding thread weight.

Madame Sajou Thread Numbering System

Superior Threads Understanding Thread Weight

Which Thread To Use

Fils Au Chinois 40wt Cotton

The big question is which thread should I use for my project?  Many say just use a 50wt, Aurifil, Amann Metter, all the major brands have 50wt.  50wt is a great, but not alway the best for a project.

28/30/40wt 

My first thought is Embroidery and Big Stitch quilting.   Machine Embroidery Thread is shiny, and most of the modern embroidery thread is Polyester, Nylon, non natural fiber.  And I prefer natural fibers, Silk, Cotton, Viscose/Rayon, Linen.

Aurifil makes a beautiful 28 weight Cotton, I find it excellent for Big Stitch quilting and Sashiko work.

Sajou in Paris, carries the full line of Fils Au Chinois, they make the most beautiful 30wt Silk thread that can be used for Embroidery, Big Stitch Quilting, Sashiko, project you want the most beautiful shine that only silk can provide

60wt

60wt is my go to thread, I use it for almost everything.  I find it is the perfect thread for my machines and my projects.

Amann Mettler and Scanfil have the best affordable 100% cotton 60wt thread.  I use this thread for piecing, embroidery, quilting, etc.

In piecing 60wt is almost invisible and really reduces bulk so you can piece with tight tiny stitches.  I personally piece using 1.5 mm stitch length.  For quilting it is great, if you use a matching thread to you background you can quilt with a single then triple stitch, and the single stitch almost becomes invisible for that hand look quilting work.  And embroidery, 60wt cotton develops into a fine embroidery, great for Freestanding Lace and other delicate projects.

100wt or finer

This very fine thread has many uses.

Top of the list is Heirloom Sewing, Fine Piecing, Lace Making and hand work.

Fils Au Chinois has a 100wt glove thread, excellent for hand piecing, Applique and small machine projects where invisible stitches are required.  (Note:  This thread is waxed, so you must be careful with using in your machine as the wax can build up in your tension area).

Fils Au Chinois 170wt Lace Cotton

Fils Au Chinois also makes 100% cotton thread for lace making.  You can get their lace thread alway to 170wt.  So fine, find it hard to work with, but beautiful thread

YLI also makes a wonderful 100% cotton thread, excellent for Heirloom sewing and Piecing.

Understanding Fibers

Amann Mettler 30wt Poly Sheen (Polyester Embroidery Thread)

Polyester Thread is the most common, it is inexpensive, and readily available.  There is nothing wrong with using a synthetic fiber based thread.  Polyester is generally used in General Purpose Sewing Thread, and Embroidery Threads for it shine and large number of available colors.  It is just not my choice.  Also you have to be careful as some companies market a polyester embroidery thread a rayon.  Real Rayon or Viscose is usually made from Tree Pulp.

Gutermann Sulky Embroidery Thread (Polyester listed as Rayon)

Nylon is another synthetic fiber thread.  Many people use this as it can be transparent, invisible thread.  Many Long Arm Quilters use these thread types.

Cotton is a natural fiber that is sustainable and renewable.   But Cotton is a little more expensive than the synthetic threads.  And cotton is not as strong as the synthetic fiber threads.  But it washes and wears naturally with your finished project.

Fils Au Chinois Rayon/Viscose

Fils Au Chinois Rayon/Viscose

Rayon/Viscose is another natural fiber usually made from Tree Pulp, or Hemp.  It is mostly used in Embroidery thread, again for its large number of available colors.  This thread can be expensive.  But it does have silk finish or shine and feel.  But be careful many companies sale synthetic fiber threads as Rayon.

Fils Au Chinois 30wt Silk

Silk is the most beautiful threads with the most beautiful colors.  Most everyone would agree.  But 100% silk thread is expensive.  But there is nothing like it.  The best silk embroidery thread I have found is from Fils Au Chinois make a 30wt silk thread.  It stitches out beautifully.  There are many companies that offer 100wt silk thread used for Piecing and other find projects, Superior Kimono Thread comes to mind

Fils Au Chinois Metallic

Fils Au Chinois Metallic

Fils Au Chinois Metallic

Amann Mettler Metallic

Metallic thread is a special thing.  It is gives your project a rich and luxurious look,  Metallic thread is usually a foil wrapped polyester cord.  The thread gets twisted and breaks easily.  It is very hard to work with, you need special needles and to really slow your sewing machine down to use these threads. But for embellishment there is nothing like using a gold or silver Metallic.  Amazingly beautiful

Closing

There is no right or wrong thread for any project.  It is about the look and feel you are wishing to achieve in your project.  I prefer natural fiber thread.  But that does not make synthetics bad.  It is your choice.  But as long as you understand that pros and cons of each.

Wishing you all the best in your sewing project

Husqvarna Topaz 30

Husqvarna Viking Topaz 30

When I first had the idea to start quilting again, and having lost the ability to hand sew.  I started looking for a sewing machine that could help me on this adventure of adapting to a new way of doing things.

There are no blogs out there discussing how a person with difficulties can sew. So I started this blog.

Well my first machine was the Husqvarna Topaz 30.  It had all the features I thought I could possibly ever want or need.  And it came previously loved at a really good price.  So it was an investment, however if I discovered this would not work, I would not be devastated at the investment for an experiment.

Well I discovered I could use a sewing machine.  I still have many difficulties and future posts will discuss how I have overcome these issues.  But now let’s discuss the Topaz 30.

This machine came with a great deal of baggage, there are many horrifying reviews on this machine.  But since this was a path of learning and discovery, and the price was right, I decided to go with my Dealers recommendation.

At A Glance

Topaz 30 Function Keys

The Topaz 30 is an older machine.  It does not have a touch screen or all the fancy alignment features many of the newer models have today.  But it gets the job done.

Above the needle are the function keys most used:  Start/Stop, Needle Up/Down, Fix, Scissors, Reverse Stitching and Speed Control.

The right side of the machine has a small monochrome screen.  But it works well.  To the right of the screen you have four 4 rows of buttons.  From Left to Right Top to Bottom:  Hoop Selector and Position selector (Current Stitch, Parking, Bobbin, etc), Rotate design 90 Degrees, and Embroidery Information.

Second Row:  Stitch Minus, Up adjustment, Stitch Plus

Third Row:  Left Adjustment, Ok, Right Adjustment

Fourth Row: Thread Color minus, Down Adjustment, Thread Color Plus

The keys below the screen are pretty much your standard Husqvarna Viking Keyes:  Stitch Selector, Settings, Alphabet, and the Famous Sewing Advisor.

Topaz 30 Menu and Control Keys

Working on the Topaz 30

Winding the bobbin and threading the Topaz 30 is made easy by the on board guides that are clearly identified, a beginner would have no problem navigating the process

Once the machine is threaded, before you select your stitches, it is necessary to identify the type of fabric you will be working with in order to assure that the automatic tension setting is properly engaged.  I had a few skipped stitches when I forgot to follow this step .

You must use the famous HV Sewing Advisor on the lower edge below the screen.

A: Woven Light

B: Woven Medium

C: Woven Heavy

D: Knit Light

E:  Knit Medium

F:  Knight Heavy

G: Leather/Vinyl

1: Straight Stitch

2: Overcast light

3: Overcast semi light

4: Overcast Baste

5: Overcast 3x ZigZag

6: Overcast Hem

7: Overcast Buttonhole

Topaz 30 Stitches

The Stitches are shown on the lid of the machine.  There are several different stitch groups, and each group has several different options.  While this looks complicated, it is not that hard to comprehend.

After selecting the group simply dial up the stitch number on the touchpad and you are all set.  The stitches produced by the Topaz 30 are some of the best I have seen.  They are smooth accurate and beautiful.

I have rarely had to alter any settings like Tension when using the Sewing Advisor to first setup my tension and sewing environment.

Embroidery

FSL Motif

Closeup of FSL Motif

The embroidery options are pretty amazing on this little machine.  However there are some thoughts.  The manual says the machine can accept various embroidery types.  I have only been able to stitch VP3 files, standard Pfaff/HV format.  I have not been able to use VIP, EXP and several others.  So I stay with the VP3 and they work amazingly.

The Large Hoop (360×200)  is amazing.  However, I am quilter so I tend to use the 200×200 hoop the most.  But this machine embroidery system is fantastic.

It is very easy to align items in the hoop. Not the precision of many modern machines.  The Brother/Babylock with their laser, or the Bernina with the MM alignment.  But my Topaz 30 has gotten the job done.

Moreover, the auto jump stitch trim and the thread snips are wonderful and simple, and make cleaning up your embroidery designs easy and quick

I have used the machine to make Freestanding Lace, Applique and even Piecing in the Hoop projects.  It has not failed yet.

Issues

There are many articles out there about how bad Husqvarna Viking machines have become, I agree and disagree with these assessments.

First off, I had major tension issues and Thread jams and breakage.  There was a huge software update that repaired a great many of the tension issues.  I also found that my needle was just a hair from perfect center.  But my dealer updated and repaired needle alignment issues, I pretty much use this machine for embroidery and quilting, so I tend to use the straight stitch plate all the time.

And finally my Topaz 30 had major issues with thread it just did not like.  The machine disliked Coats Dual Duty, and it hates every type of Gutermann Thread I used.  It does not like Polyester, and Metallic thread at all

However, I have found it really likes Amann Mettler Silk Finish 60,  Fils Au Chinois Cotton and Silk Thread.  It also like ScanFils Cotton 60.   It really seems to like using the thinner threads #60 to #120, natural fibers like Cotton, Silk and Rayon.

But since I found my thread and had it serviced and updated this machine has become a joy to use.

Overview

The HV Topaz 30 is a good sewing and embroidery machine and produces surprisingly high quality stitches.  This machine is excellent for intermediate beginners, you must have mastered understanding of how to thread and basic knowledge of tension issues.

I personally enjoy my Topaz 30, but it does have its pros and cons.  This is not a machine I would recommend for a beginner, as I have had my difficulties, and my days of wanting to throw it out the nearest window.  But once you understand what it needs and desires, the Topaz 30 forms amazing stitches and is an amazing simple embroidery system with a large hoop.

Would I buy the Topaz 30 again,  For the price I got yes, but can a recommend it.  Yes and No.  This machine does have a learning curve, and there are so many newer machines that are unbelievably simple to use.  But if you can get a good deal, and have a basic understanding of a sewing machine then Yes go for it.

Pfaff Performance 5.0

An early Christmas Present to myself (2016).  I purchased the Pfaff Performance 5.0 (P5).  I have admired this machine for months.  But found it a little costly for someone that did not know if they could actually use a sewing machine.

The Pfaff Performance 5 (P5)

This machine was perfect for me, my dealer (Naaimachine Huis Haarlem) gave me a excellent deal (50% off), as this was the last model in stock, the new Performance 5.2 had been released.

I looked at Bernina, Janome, Husqvarna Viking, Brother, Juki and others.  I liked the quality and weight of the Bernina. However, the Pfaff and Husqvarna just seemed to work for me. The others were nice but the feeling was just not right.  I purchased a previously loved Husqvarna Viking Topaz 30 as my experimental machine.  I found I could sew with all my limitations.

So after several months I realized I wanted a second machine.  A sew only machine.  So my search began.  I was seriously looking at the Husqvarna Sapphire 960q.  But when I was offered the deal, I choose the Pfaff P5.  I have not regretted that decision.

The last few months, I have used my machine almost daily.  Being a Quilter, I have pieced, Appliqued, and quilted.  This machine is wonderful.  I am going discuss the technical and my personal feelings on why I love this machine.

Technical

Features

  • More than 300 utility and decorative stitch options
  • 4 alphanumeric fonts
  • Maxi and Monogram stitches up to 48mm wide
  • Tapering
  • LED lighting
  • 3 free motion modes
  • Pfaff exclusive IDT [Integrated Dual Feed system]
  • Needle up and down
  • Start/stop button
  • Mirror imaging
  • Sensormatic buttonhole
  • Bobbin thread sensor
  • Variable speed control slider
  • Immediate tie off
  • Straight stitch needle plate sensor
  • On board stitch selection guide

Accessories

  • 10 snap on presser feet
  • Quilting bar
  • Lint brush
  • Seam ripper
  • Sensormatic buttonhole foot
  • Spool pins
  • Spool pads
  • Detachable accessories case
  • Extra needles
  • Bobbins
  • Screwdriver
  • Hard cover
  • Extension Table (I purchased separately)

The P5 is very user friendly.  Adjusting stitch length, width and even density is easy with the included stylus and the well light touchscreen.  The stitch quality is excellent, the tension is always spot on, and the electronic pressure foot works flawlessly.  It also includes a knee lift (Bernina Style), which I do not use, due to physical limitations.

The very bright colored touch screen, with Stitch Controls

I choose the P5 because all the controls and screen are on the main machine arm.  This have been a very intuitive placement. I can glance up from the stitching area and see all the information my machine has to offer on its colored touch screen.  I like the Needle Up/Down, Pressure Foot Up/Down, Thread Snips, Speed Control, and the Fix function buttons on the main sewing arm.  This allows for plenty of space for each button.  After a few hours of using the P5 you instinctively know where every button is placed.  You do not have to look or guess, just reach up and push.

The excellent spaced Control Buttons (Needle/Pressure Foot UP/Down,
Fix, Thread Snips, Speed Control, and Start/Stop Buttons)

Next I find the automatic presser foot up/down to be perfect for me.  When the needle is in the down position, the foot rises a little to turn or adjust your project.  If you press the thread snips the pressure rises up to remove your project.  This feature is great for me, as it allows total focus on my stitch line and the project.

The Automatic Pressure Foot

Sewing

Straight Stitch is effortless.

I have used the Patchwork Memory Feature to program the stitches to perfectly piece 2.5 inch blocks.  Starting a ¼ from the edge, the program stitches 3 fix stitches, sews a perfect 2 inch seam with a 1.5 mm stitch length, and the ends with 3 fix stitches and snips the thread. This gives your piecing an excellent hand stitched look.  It has never missed a beat.
Also have used the Foundation Paper Piecing Method, in the Quilt Shows 2017 Sue Garmon Block of the Month.  Using a 1mm stitch length, the paper almost falls off after piecing. Funny I was distracted while paper piecing and the P5 sewed right across the head of my Clover Flat Head Pin, used to align the seams.  The P5 did not miss a step.  I sewed through the tough hard plastic head at 1mm without breaking or bending the needle.  I found that unbelievably amazing.

The Pfaff Performance 5 sewed through the head of a pin

I have used the free motion setting to practice and play.  No serious work.  But it just worked for me.  Did exactly what I wanted when I wanted.

Decorative Stitches unbelievable.

I have used the Blind Hem, Blanket Stitch on applique. Amazing! Using the open toe applique foot and the stitch in the ditch foot, I have not missed a step.  The P5 is easy to use.  The sewing area is highly visible and well light.  I do however use alternative lighting connected to my magnifying glass.  This helps me see the details.

My Personal Sewing Area Setup

The Satin Stitch is beautiful.  For various projects, mainly Applique, I have used a 1mm to 9mm wide satin stitch.  Every stitch as beautiful as the next.

I have also used the decorative stitches including the Maxi Stitches in my quilting.  Using my Circular Attachment I have created perfect 20 to 40  mm wide Maxi Stitches in a circle and bordered by a Candlewicking Stitch.  This makes WholeCloth Quilting Fast Simple and Easy.

Conclusion

I find the P5 to be the perfect machine for individuals with limitations.  The wide stitching area makes it easy to access your project at any time.  The LED lighting is excellent.  The control buttons and screen location is perfect for arthritic hands and limited vision.  The colored touch screen is easy to read and adjust with my fingers or the included stylus.   The automatic pressure foot is excellent as well for limited mobility and arthritic conditions.

The wide and easy to access sewing area. Perfect for Quilting

The only feature I have found unuseful on my machine the Pressure Foot Knee Lift.  My Arthritis makes it painful to use.  So I use the automatic feature.  But the option is there for the person that can not live without it.

I can envision myself creating beautiful quilts on this machine for years to come.  Thank you VSM and Pfaff for making such a machine for me.

Video Review

The best Video Review of the P5 is from Village Sewing, excellent overview of all the functions on this machine

Martelli Rotary Cutter

As I have discussed previously, been having terrible pain in my hands. Similar to Carpol Tunnel, actually Neuropathy.

Standard Rotary Cutters was causing pain but had to use. A friend recommended the Martelli cutter.

The cutter to some time to get used to. But the ergonomics really help with pain. I know these are not the most affordable option. But if you have hand wrist or arm pain, have to say it really works. And thus well worth the price

Martelli Rotary Cutter