Bridal Wreath is a applique block. I would have loved to turn the edges. But age and limitation can no longer turn the edges on small shapes. Therefore, using raw edge techniques. This was a fun block.
Cutting
1 x 12 1/2 x 12 1/2″ inch block background fabric
scaps for various shapes. 8 hearts, 20 leaves and a bias band for the wreath ring.
The PDF are the templates to make the block Bridle Wreath
Assembly
Using templates and scraps I cut all the individual pieces out on the stitch line as I used raw edge techniques. however if you are able to turn the edges I included cut and stitch lines.
I looked at using a satin stitch or bias strips to make the wreath ring. I choose bias. I cut my fabric on the bias and double fold. I cut a 1″ inch strip then folded both sides to the center which gives you 1/2″ strip then fold in half again for a 1/4″ bias strip.
using the large circle template and temporarily securing to the center of the 12 1/2″ square background fabric. I placed the bias strip I made around the edge of the circle. I used my Elmer’s purple glue stick. slowly apply the strip around the edge.
the bias ring can be treated at turned edge applique. So I again used the Shelly Tobasche Method. using a modified 0.8mm x 1.0 mm long Balance +20 modified Blanket Stitch. Stitching around the outside and inside of the ring. Remove the center circle template.
Gluing the leaves down around the center ring. ( note: Hind sight i would have added the hearts first) I stitched the leaves using a standard blanket stitch 1.5 mm x 1.5 mm.
adding and stitching the hearts using the same 1.5 mm x 1.5 mm blanket stitch.
Success Block 19 Billie’s Sampler Bridal Wreath is finished. I really enjoyed the applique.
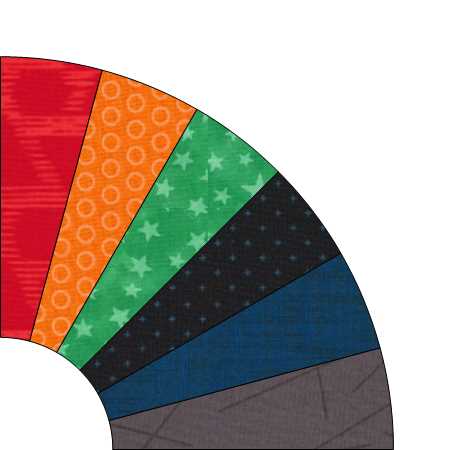
I cut my 6 blades using the templates in the PDF. Using seam align glue secure the templates to your fabric. I used scraps from previous blocks.
I assembled my blades one at time. wanting to keep my color order correct and for accuracy. using seam align glue again with pins align each of your blades in the proper order. The stitching line on the template helps with accuracy.
after assembling all 6 blades. and pressing properly.
wanting a smooth edge, I decided to turn my edges. Using a piece of waster soluble mesh stabilizer. laying on top and stitching a 1/4 seam on the stop and bottom curve of the fan.
Trim excessive stabilizer away
because both sides are left open. Turning was no issue. it was fast and easy.
using low heat on your iron press your fan smooth. Be careful that your iron is not too hot as it can melt the stabilizer on the back. Because you used water soluble you do not need to remove the stabilizer. This gives you are good clean perfect edge to applique your fan to the background square.
I used my Elmer’s Purple glue stick to secure my fan to the background. it is easy to align just align so that the two sides are even with the edges of the 12 1/2 inch background square.
I used a special applique stitch. A modified blanket stitch. which is 0,8 mm wide by 1.0 mm length with a Balance adjusted to +20 This makes the blanket stitch look very similar to a blind hem but with only one stitch forward. Also this allows me to use my straight stitch 1/4″ foot and plate on my sewing machine. (Note I use a Bernina) This method also worked on my Pfaff but had to use my 9mm stitch plate because the machine automatically recognized my stitch plate
I also had a Janome. I could not just adjust the stitch like the Bernina and Pfaff as my Janome didn’t have balance setting for the stitches. However I could make the stitch in the Horizon Link Stitch Composer. (Note: my Janome was a Horizon Memory Craft 12000)
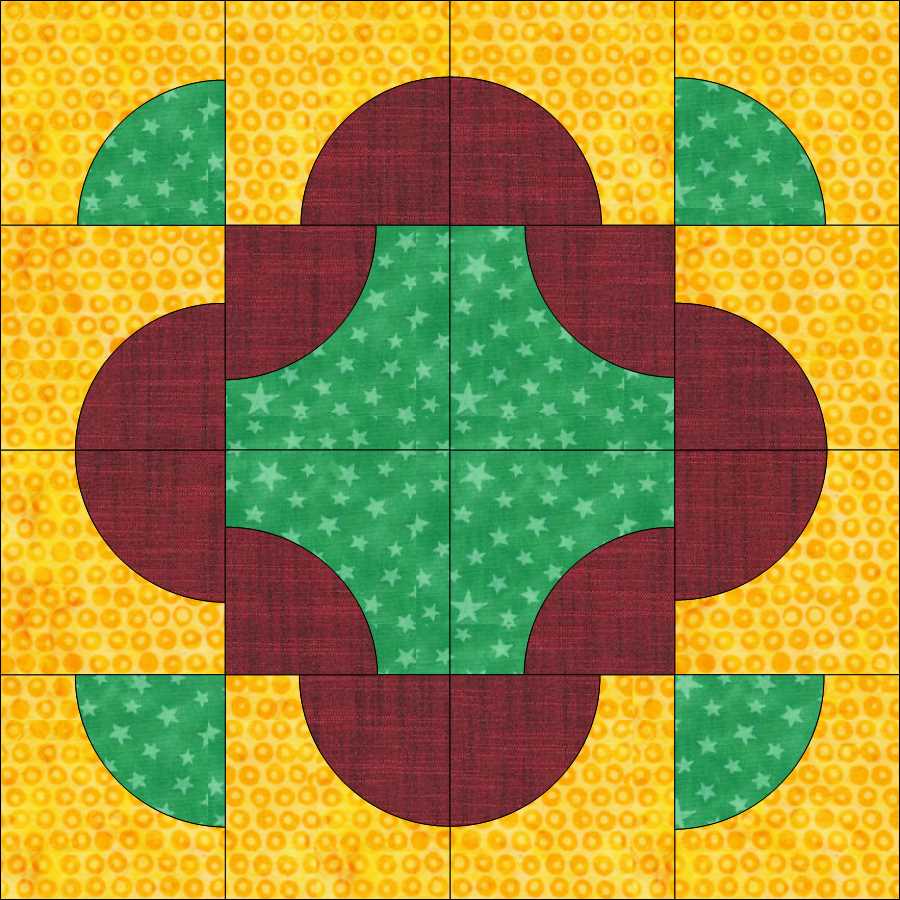
The Drunkards Path block is a tradtional block. However, it requres curved piecing. There are many videos and posts online how to make the tradtional Drunkards Path block. So I am not going to spend time elaborating. However I am attaching the templates to make the 16 blocks required for Block 3. Each block is 3″ inch finished.
1 circle is to use the corner (center) fabic and 3 circles are the darker color for contrast. Place water soluble mesh stablizer on front (right side) of fabric and template on top of the mesh. Stitch using a straight stitch (used 1.8mm stitch )
Cut your circles out with approximately 1./4″ inch allowance. Doesn’t have to be perfect.
Remove paper template, should be easy when using a 1.8mm stitch.
Clip a hole in the center of the mesh and turn your circles right side out. and you might want to press with a lightly warm iron (not a hot iron my melt or shrink your mesh) and do no use steam. Moisture with dissove the mesh.
Now we must mark your circles with an X with the point in the center. Also at the same time mark your 7″ inch squares from corner to corner
Using your prefered water soluble glue (for this project Elmer’s Purple Glue stick was used) glue your circles to the center of each of your squares using the lines to get everything perfect. use a warm iron to set your glue.
Once all the pieces are complete and stable Using a 2mm x 2mm blanket stitch (Amann Mettler Saba 150 wt thread) stitch your circles down. Work slowly so that the stitching is smooth as possible. Moving the needle to the far left and the #20D Bernina Open Toe foot was perfect for this task. You can use your favorite applique foot.
With the applique securly stitched. it is time to cut your 7″inch squares into 3 1/2″ quarters. There should be 4 blocks per 7″ inch block making a total of 16 – 3 1/2″ inch drunkards path block.
Layout your design. Careful to get all the curvers and points to match. You can see I used the Pink Batiks for my center and corner accents and white for the backgroud.
Piecing the block together is a simple matter of working with four patch block. Stitch two blocks at a time. the 4×4 grid or 16 patch is actual simply 4 x four patch blocks assembled into a pattern.
Caution when pressing seams. The center area of the blocks can become a little think and difficult to work with, Take your time and press your seams flat. I used Acorn Precision Piecing Pressing Solution.
Now your block is finished. Success The Drunkards Path is complete. With that over with, a huge sigh of relief on my part. I have done several challenges using drunkards path, and I can honestly say this is not a favorite. But it is complete.? And acceptable for me. Even though not perfect.
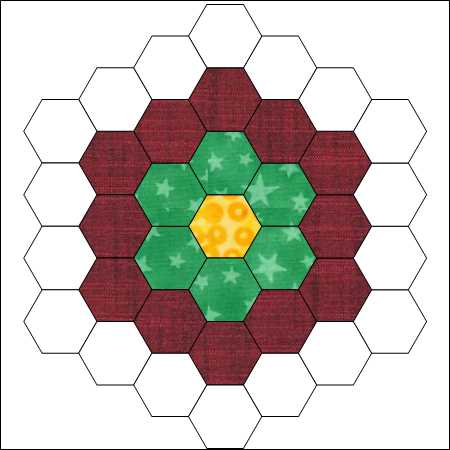
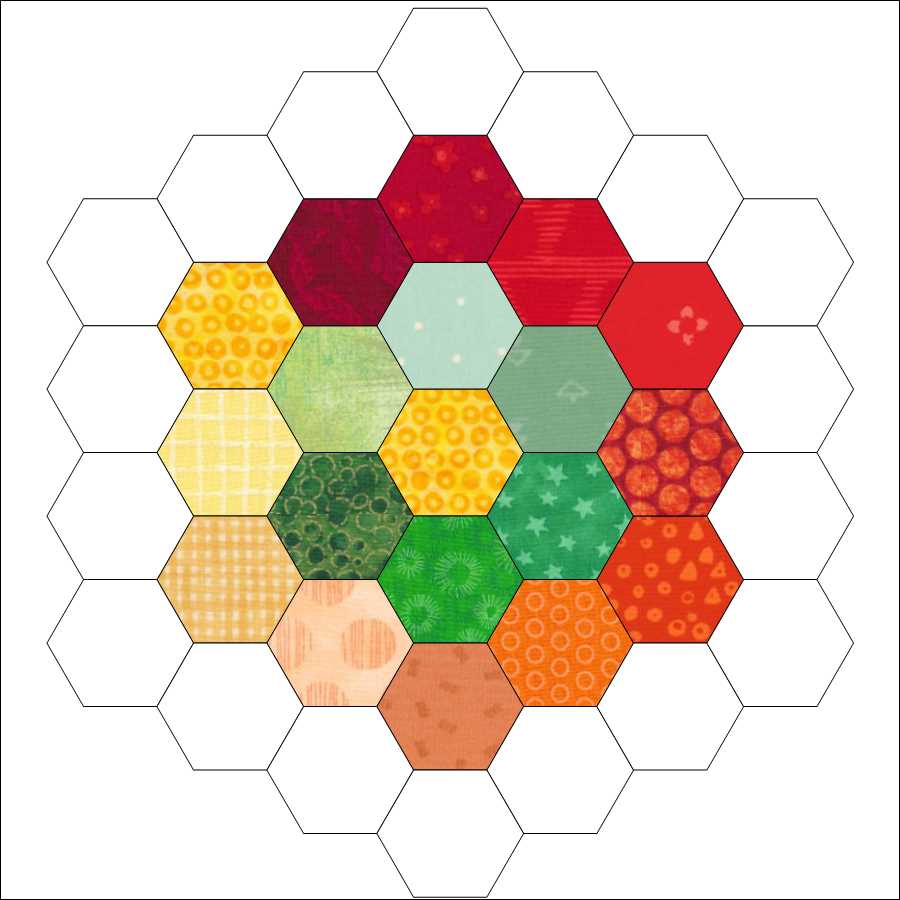
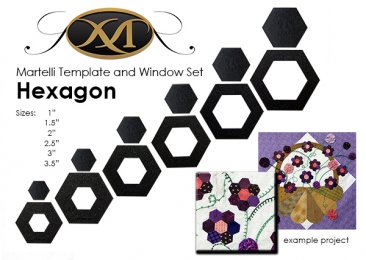
Grandma’s Flower Garden Block is old basic Hexagon design. This block can be Pieced, English Paper Pieced or Appliqued. The applique method depends on your personal style. You can use Raw Edge, Turned Edge, or like I, Satin Stitch.
But a note about the satin stitches. I will not use this method again. It took me three (3) days of stitching to finish this simple block. One (1) day cutting hexagons and stitching each down on my 12 1/2 x 12 1/2 backgroud block. And two (2) days to acutually stitch all the satin stitches. However, I never do myself any favors. I manually tapered each point on every hexagon. What fun. My Bernina B590 does not offer tapering. However my Pfaff Creative Sensation does have this feature, which would have made my life so much easier. So suggested do not try this unless your machine has a tapering feature. Just for Sanity!
Working with Hexagons
Talk about teaching a old dog new tricks. I learned something new working with the hexagons in this project.
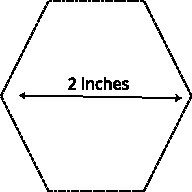
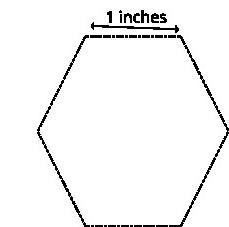
I was always taught that a Hexagon is measured by using its diameter. Point to point. So in this block you would use 2 inch finsihed hexagons. However in quilting a hexagon is measured by one side. Thus getting a 1 inch finished hexagon. Always something new.
Piecing Hexagons
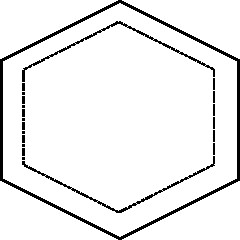
If you choose to piece the hexagons, then you would need to cut 19 – 1 1/2″ inch hexagons for this block. It must be noted that when piecing hexagons you do not want to stitch from edge to edge. The reason is the stitch crossing all the different corners causes little bumps in your block. Therefore, you always piece a hexagon starting 1/4″ from the edge and stopping 1/4″ before the ending edge. This why so many hand piece. However, with many modern machines you can create a program stitch that is 1″ long or 25mm to 25.5mm long swam (1″ equals 25.4mm). You can even program locking stitches. On my Bernina this procedure is called Stitch Recorder, On my Pfaff called Stitch Program My old Janome MC 12000 would automaticlly ask if I wanted to repeat the stitch sequence that was just completed, this popup showed when using the piecing function in the T-shirt menu.
Notice the inside stitching line in the imagine above. To make this process easier, I would mark my seam lines. Using Martellie Hexagon Templates use the 1 1/2″ hexagon template to cut the 19 hexagons. Then using the 1″ hexagon placing in the center of the cut 1 1/2″ hexagon piece, using pencil or other marking tool, mark the seam allowance, using the edge of the 1″ hexagon template. You can also use a Studio 180 Magic Wand or any other tool that helps you to mark a 1/4″ seam allowance.
Satin Stitch Applique
I choose to use Satin Stitch applique. Using the same method with Turned or Raw Edge, minus satin stitching around each seam.
First cutting 19 – 1″ inch hexagons, I used Martelli Heagon Templates. Also need to cut 12 1/2 x 12 1/2 inch background square. Locate the center of the background square. Note the pencil lines from corner to corner and middle to middle on the image below. Gluing your center hexagon to the center of the square Then glue each round of hexigons. for a total of two (2) rounds. I used Acorn Precision Piecing Seam Align Glue, however, it is okay to use Elmer’s or any other Water Soluble glue for this step.
After the glue is set, either by drying or pressing with a warm iron. Using a small zigzag stitch, I used 3mm wide by 2mm lengh. Using your stitch in the ditch (edge stitch) foot (#10 Bernina Foot), stitch around all the edges of your hexagons. The blade of your foot can follow the space around each hexagon. (Thus you have 1.5mm on each hexagon). This secures yours hexagon pieces to your background fabric.
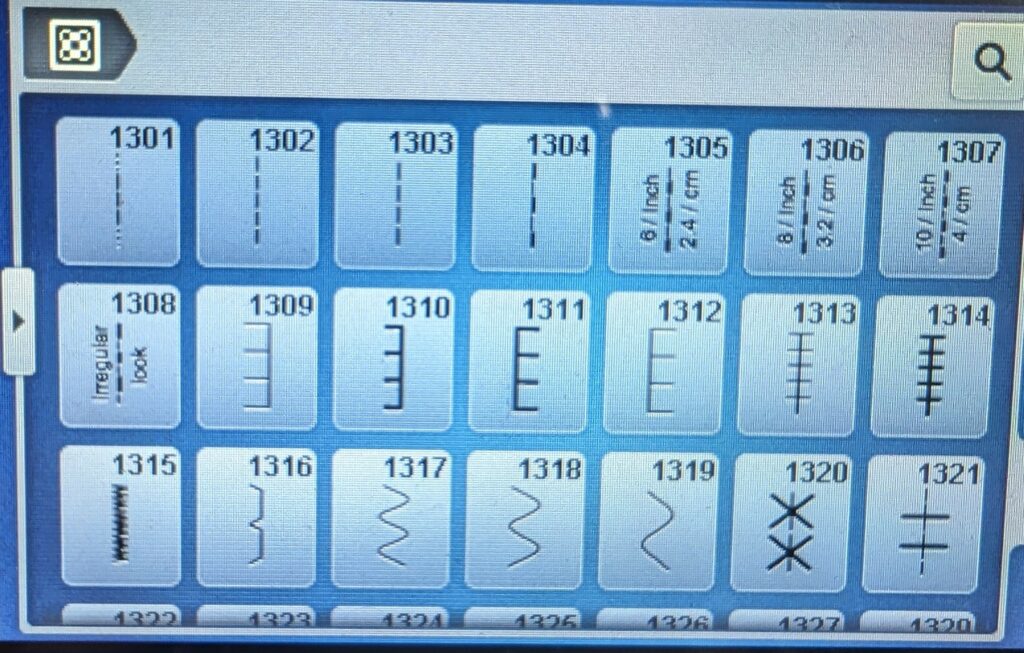
Note, if you choose the Raw edge method, then it may be better to increase the width of your zigzag to 4mm or 5mm. Also you can use a blacket stitch or double blanket stitch for this method (Blanket Stitch1309 and Double Blanket Stitch 1313, This stitches my be differrent on your machine). By choosing Turned edge, then may want to decrease your stitch width for a more invisible stitch.
Statin Stitching
Choosing a tapered statin stitch was a difficult choice. Wanting to make the design look more like a flower bloom and each heagon as a single petal. Adding two (2) layers of tear away stablizer. Also used used a tapered 4mm statin stitch, using Amann Mettler Saba 80 weight, corespun polyester thread.
Well this was a interesting block and first step in creating the Billie Sampler. Loved the choosen method in theory. However, time and end results where not exactly what was intended. Will I redo the block no! Will I choose this method again NO!
Gotta love #BarbaraBrackman The #EncylopdiaOfApplique Years and Years of new projects. My #BlackFriday Deal. The postage and Import was triple the cost of the book from #ThriftyBooks.
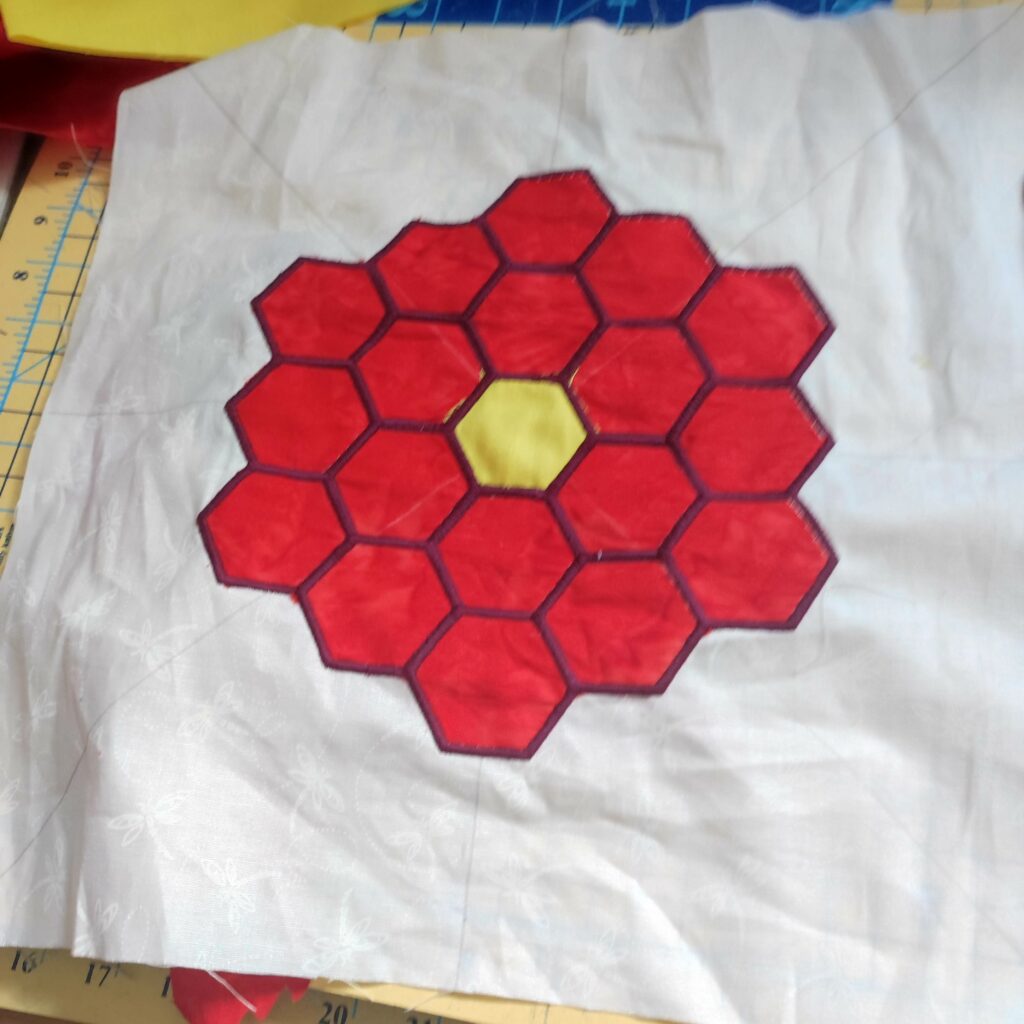
Finally finished my #SusanMadu #modernblendedquilts #CalendarBOM for the Month. The first block was a test if my sanity. Think it pressed every nerve, a true brain teaser. It seams every block set in sewed backwards or incorrectly. Never ripped so many seams and stitches 🪡 for any project. Finally got my block assembled. Then made my turned applique circles and when doing final press the stabilizer melted. So redid my circles the old way turning the edges by hand. A true test of patience and endurance.
But used a new applique method from #ShellyScottTobisch of #acornprecisionpiecing, i highly modified blanket stitch for a true hand look, love it! Used #Aurifil #monofilament, do not like this thread. But did not have a dark 100wt silk or 150wt core spun poly.
Working on turned #applique today. Wow the #ShellyScottTobisch way is absolutely fantastic, those stitches are Magnificent. Do not like the #Aurifil #monofilament but happy with the result
One does not establish a dictatorship in order to safeguard a revolution; one makes a revolution in order to establish a dictatorship.
#GeorgeOrwell #FridayQuote
Quilt – Baltimore Album 1850 Ruth Penn, Daughters of America Museum