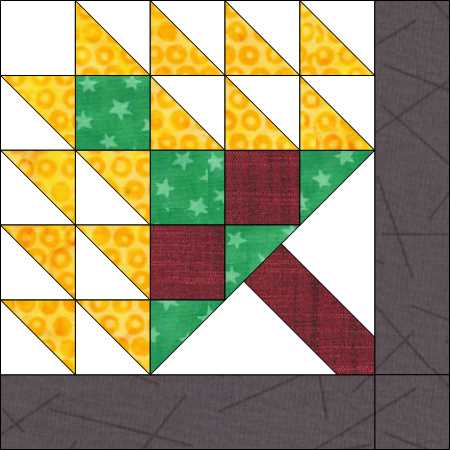
Tree or Tree of Life block is one of my favorite. I again paper pieced as I wanted all my points to be accurate and also discovered Electric Quilt 8 doesn’t like to define cutting instructions for unusual shape pieces with more than 4 sides, I discovered this is a major issue.
6 x 2 1/2 x 2 1/2″ squares (I cut mine squares 3″) 1 x Background (White) 2 x color 2 (dark red), 2 x color 3 (orange), 1 x color 4 (dark red)
16 x 2 7/8 x 2 7/8″ squares cut into HSTs (cut mine 3 1/2″). 14 x Background (White) 14 x color 2 (Dark Red) and 2 x color 3 (orange). All the squares should be cut into HSTs, total 32 HSTs.
1 x 6 1/4 x 6 1/4″ square cut into QSTs (cut mine 7″) Background Fabric
2 x 10 1/2 x 2 1/2″ strips (cut mine 11 1/2 x 3 1/2″)
1 strip not defined for stem cut mine 3 1/2″ width of Fat quarter
Assembly
paper piece all the HST strips Note of caution make sure all the HSTs are turned all the correct direction.
paper piece the base triangle.
trim on the cut line on all the sub pieces.
assemble all the sub pieces forming the tree.
Now add the strips on the two sides
Oh My we have completed all 24 blocks in the Billie’s Sampler Amazing and a huge Congrats.
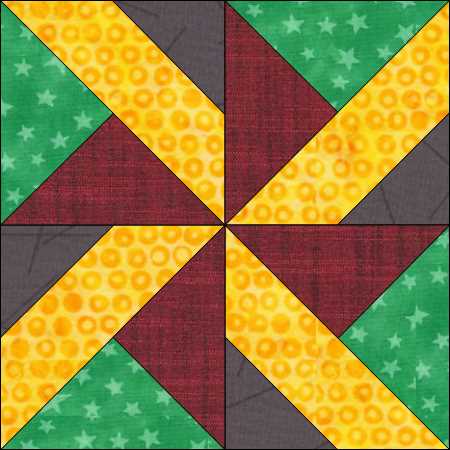
This was a quick easy block. I again chose to paper piece, as I wanted all my points and colors to be perfect. It is basically I simple 4 patch which I paper pieced each sub block. The sub blocks are all the same except for the direction in which they are turned into the block, creating the windmill effect.
Above is the cutting instructions . The Foundation Paper Piecing templates. However if you choose to piece using traditional methods the last document is the actual templates that can be used.
This block has a weird cutting instructions. I just cut half square triangles to convert
2 x 3 7/8 x 3 7/8 inch square (I cut mine 4 1/2″) cut into half square triangles (HSTs). 2 squares second color (gray in the example) or 4 HSTs
4 x 5 1/8 x 5 1/8 inch square (cut mine 6″) cut into HSTs. 2 square color 3 and 2 squares color 4, should be 4 HSTs each color for a total of 8 HSTs
2 x 3 1/2″ strip Width of Fabric (WOF) (I used Fat Quarters (FQs)) this is background fabric (Yellow in example)
Assembly
All the HSTs have been cut out
Using Seam Align Glue to secure the first triangle which was orange. I then added the second triangle red secure seam with Seam align glue, then stitched using 150wt Saba from Amann Mettler with a 1.8mm straight stitch. Note: I made all 4 sub blocks at one time exactly the same
after pressing the second triangle into place, I secured my background strip to the long edge .
and finally adding the smaller corner HST to the sub block.
Now trim the 4 sub blocks on the cutting line.
with the 4 complete sub blocks arrange them in proper order and assemble as a standard 4 patch block.
Success your 23 Block Windmill Variation is complete only one more block in the Billie’s Sampler wow can’t believe we made it this far.
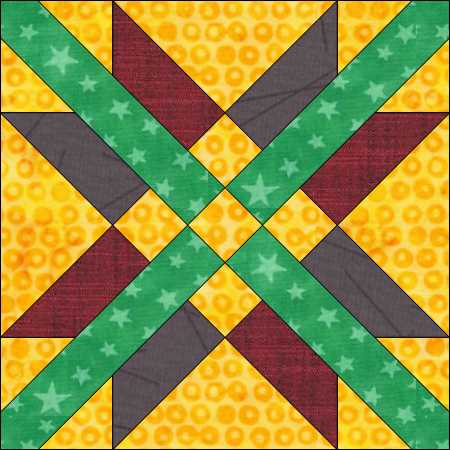
Kansas Dugout in my opinion was the most difficult block. Let me say there were was some choice words spoken while assembling this block. The entire block was partial and y seams. Not one seam is traditional. But this is a beautiful block and it was a huge learning experience.
Cutting
2 x 2 1/8 x 2 1/8″ square cut background fabric into Half Square Triangles (HSTs) , since I paper pieced this using templates cut the squares 3″ cut into HSTs.
6 x 1 3/4 x 5 15/16″ strips of background fabric, paper piecing size 2 1/2 x 6 1/2″ strips
13 x 2 1/4 x 2 1/4″ squares of mail fabric. paper piecing size is 3″ squares
16 x specialty pieces. 8 second and 8 third fabric colors. I used straps and pasted the pieces to my scraps and cut them out on the cutting line. Note: again some reason Electric Quilt ignored these pieces in the cutting instructions.
I paper pieced this block However, each piece is separate. I used scraps, using seam align glue, I attached all the individual pieces to scraps. This block is great for scraps. But it is nothing but partial and y seams. so take your time.
using pins and seam align glue to match the points and then stitching on the stitch lines on the paper templates. Note: since it is possible for the seams not to cross, you much lock the beginning and end of each seam. Also you need to be accurate on the stitch lines. if you stop short of the point then you could have a hole and if you over shot the end would cause a pucker. so take your time and be very very accurate. This block is a great skill builder in accuracy and control of your machine.
added lots of photos of the assembly This is a slow process and requires lots of patience. And lots of colorful adjectives spoken in the assembly, keep easy access to the seam ripper.
Wow Block 22 Kansas Dugout is complete. This block took lots of time and patience. All those Y seams. And must do each and every sub block individually and accurately. I added lots of photos so you can see the slow process. If you find a easier way please share?
Mexican Star Block 21 looks simple, but is more complicated than it looks. as the corner strips continue into the center Nine Patch. I tried to make it as a large nine patch but couldn’t work it out because of angles. Therefore, again ended up paper piecing.
Cutting
4 x 2 7/8 x 2 7/8″ square background fabric, cut into Half Square Triangles (HSTs), since paper piecing I cut mine larger. Again rounding to nearest 1/2 plus adding 1/2″ so cut 4 squares 3 1/2″ cut into HSTs
5 x 1 15/16 x 1 15/16 square background fabric. paper piecing cut 2 1/2″ squares
1 x 7 3/16 x 7 3/16″ square background fabric. cut into Quarter Square Triangles (QSTs). paper piecing size 8″ square cut into QSTs
8 x 1 15/16 x 5 1/8″ strips of second and third color. again paper piecing cut 8 strips 2 1/2 x 6″ strips 4 of second color and 4 third color
4 x strips 3″ x 10″ , I cut the strips from a fat quarter narrow width. 18″ Note: there is a error in the cutting instructions from Electric quilt. For some reason it ignored Fabric A .
Above are the templates for the block if you choose to use traditional piecing methods.
Assembly
using traditional paper piecing methods with seam align glue to secure starting pieces.
after finishing all the individual pieces. it is time to assemble the block.
wow congratulations. Block 21 – Mexican Star. This block went together rather quickly since I paper pieced it. I tried traditional piecing methods but it failed. Paper Piecing really make this block a great deal easier to assemble.
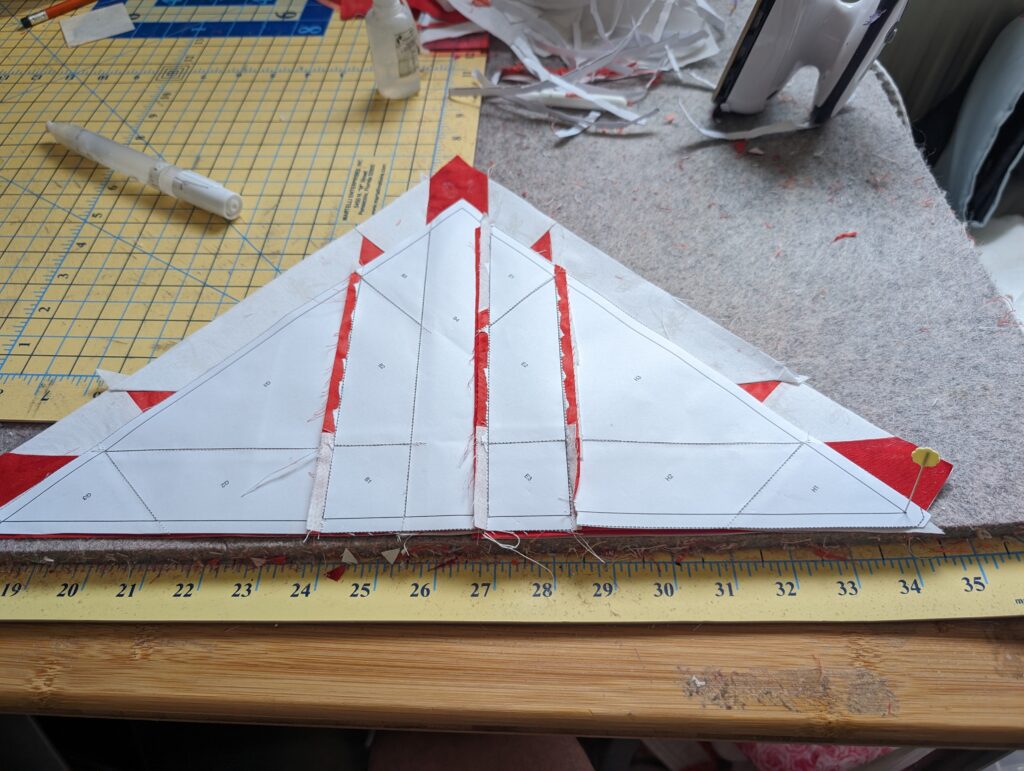
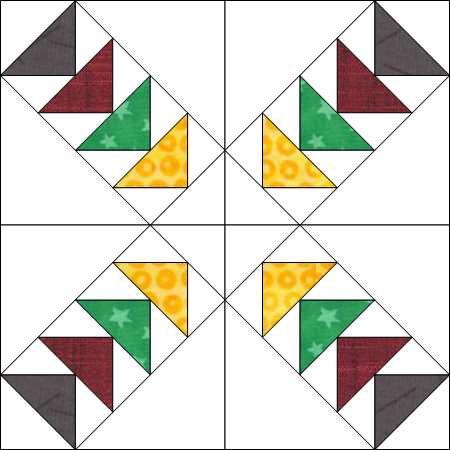
Block 8 Flying Geese was paper pieced. I thought i would be easier to create this block using Foundation Paper Piecing. This block will finish at 12 x 12 inches
The finished block is 12 1/2 x 12 1/2 inches and made up of 4 individual paper pieced blocks of 6 1/2 x 6 1/2 The block uses 4 colors in each sub block with a secondary background fabric. This makes a total of 5 fabric colors.
Cutting
Square 3 1/2 inch (4 Background, 2 x each Fabric (4 Fabric colors in total))
Square 5 1/2 inch 4 x Background Fabric
Square 4 inches 8 x Background Fabric
Half Square Triangles (HSTs) cut 4 squares of background fabric a minimum of 3 inchs. I used 3 1/2 inch for ease of assembly. Now cut these 4 squares corner to corner to create 8 HSTs.
Cut 2 squares each of your four fabrics for the center of the geese. Again cut each square corner to corner to create 4 HSTs of each color. There should be 16 colored HSTs.
Cut 4 squares of background Fabric minimum 5 inches. Again I added 1/2 inch for a 5 1/2 inch square to ease alignment of each piece. Again cut each square corner to corner to create 8 HSTs
Cut 8 squares of background fabric minimum 3 1/4 inches. However I cut mine to 4 inches. again to aid in alignment of piecing. Instead of cutting into HSTs. These 8 Squares will be cut into Quarter Square Triangles (QSTs). this is cutting corner to corner on block sides of the square to create 4 individual triangles per square block. there should be a total of 32 QSTs.
Above is the Cutting instructions to be printed These are exact sizes. (This comes from Electric Quilt 8, each cut includes 1/4 inch seam allowance.) I always increast my size a little and trim down Usually rounded to nearest 1/2 inch and then add 1/2 inch for error.
Above is the foundation paper piecing pattern. Print 4 copies. Please measure to make sure your printer is correct the dashed cutting line should measure 6 1/2 inchs the solid square line should measure 6 inches.
Note: I recently started using a new printer. A Brother. I had to increase my scaling to 103 percent to obtain the correct size. My old HP printer was very accurate. So please check your measurements.
Selecting the 4 HSTs of color fabrics and the Background fabric QSTs
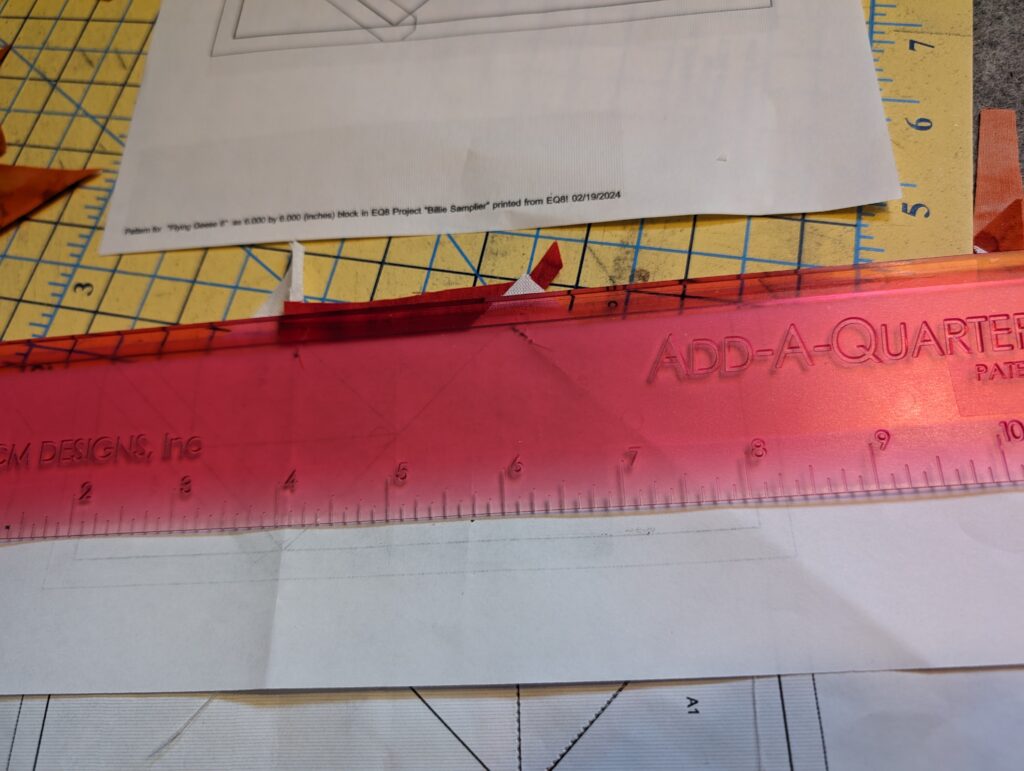
with your FPPing print (making sure it measures 6 1/2″ along th e dotted cut line) Start with the first color fabric and squre to your template. you can start at either end. I usually start at the top in this photo, the long side of the colored geese unit.
Using the background QST units assemble them on each side of your first color HST geese unit. Use standard FPP techniques.
Continue to your second geese unit.
Using an Add A Quarter ruler I trim my edges there will be a little to trim on each piece because I made each of the pieces 1/2″ bigger
once all 4 queese are stitched. Add the smaller background HSTs on each end and now add the larger background HSTs to each side of the unit.
Repeat this to complete the 4 units.
Making sure the 4 units are properly aligned preceed to assemble each of the units
Success your 8th block is complete.
Note: recently i saw an vintage quilt using this block to create a Flying Geese Irish Chain. it was stunning. Make this block has made me appreciate Flying Geese So many options and they are not that difficult with proper cutting and a little patience.
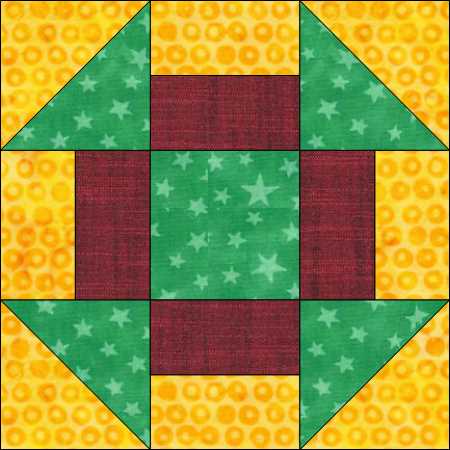
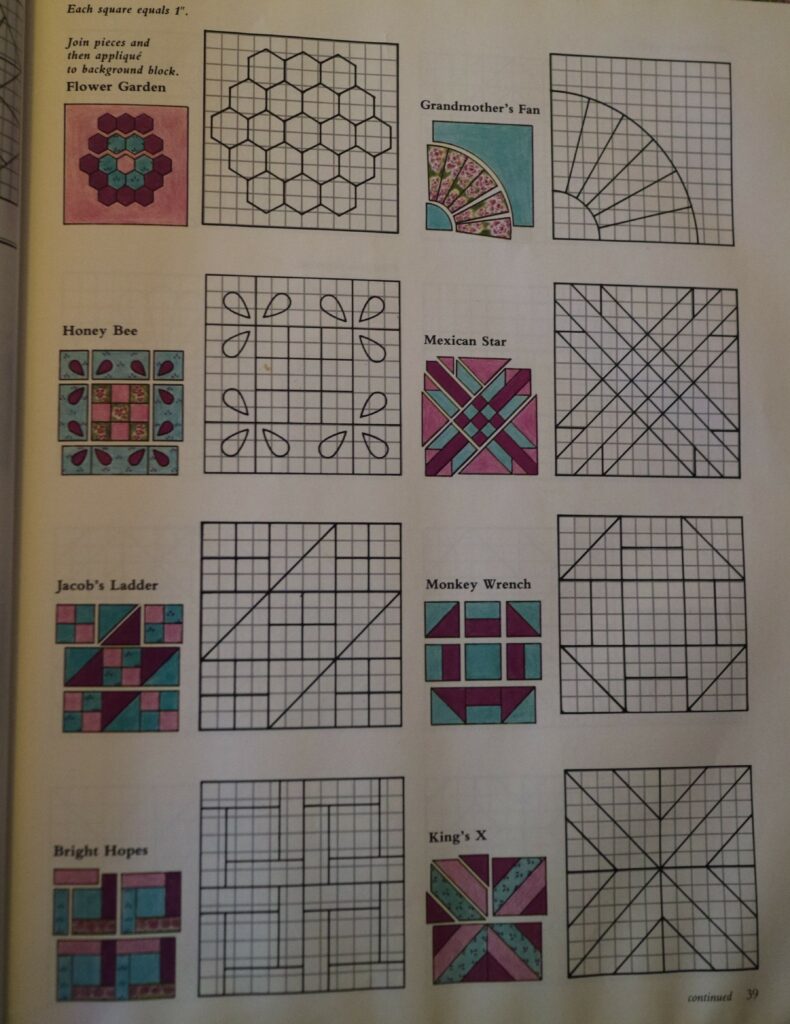
Monkey Wrench is a simple Nine (9) Patch Pieced Block. The Finished size for all the blocks in the Billie’s Smapler is 12×12″ inches.
Above is the grid layout for the Monkey Wrench block. Since we are working to create a 12×12″ inch block. Each sub block of this simple nine patch should be a finished 4×4″ inch sub block
Cutting Instructions
1 x 4 1/2 x 4 1/2″ inch Square Dark Fabric
4 x 2 1/2 x 4 1/2″ inch Rectagle Medium Fabric
4 x 2 1/2×4 1/2″ inch Rectable Light Fabric
2 x 4 7/8″ inch Square Dark or Medium Fabric
2 x 4 7/8″ inch Square Light Fabric
Note: I cut my squares for HSTs larger than required and cut down. I cut mine a 5 1/2″ inches and trim
Making Half Square Triangles (HSTs)
First mark the wrong side (or Back) of your light HST fabric with stitch lines. I mark my actual seam lines using a Studio 180 Magic wand. However many choose to mark a line from corner to corner.
Placing your medium/dark and light HST fabric right sides together. using warm iron (no steam) press to dry the glue, holding the two pieces together securely
Now stitch on your stitiching lines (or 1/4″ from center line) on each side of your HST square.
Note I choose to use a 1.8mm stitch length. Using Amann Mettler Saba 180wt corespun polyester thread. I use this super thin tread with smaller stitch length because there is no thread bulk in my seams. Also I piece using a Organ HLx5 75/11
Note: I use Organ HLx5 needles because they are hardened, with a anti heat and anti glue coatings. This makes these needles last forever, I can easily get up to 6 months of regular piecing with each of the needles. Also, please take my advice these needles are not for the beginner sewist/quilter. The reason is because of the coatings and hardening, when you break one, it can severely knock your machine out of alignment. I have had to take my machine to the dealer/tech a couple times becuase I broke a needle and it moved the needle position or effected the machine timing.
Futhermore, Schmetz also makes an HLx5 needle. The Schemtz HLx5 version has a ball or dull point, where the Orgran version has a very sharp point which is what I prefer?
Cut your squares corner to corner between your two (2) seams. This will give you 4 HSTs. Press your triangles open to the darker fabric.
Using 5 1/2″ squares, it is needed to trim your HST squares down to 4 1/2″. I use my Martelli Square Template 4.5″. Align the corner points of template with your seam line. Trim using the edge of the template. This gives you a perfect 4 1/2″ square.
The HSTs step is complete?
Stripe Center Blocks
Taking your 4 Dark and Medium 2 1/2×4 1/2″ rectagles. Stitch each set together on the long side. Again I used Saba 180wt thread with 1.8mm stitch length. Press your 4 squares open to the dark.
Assembling Block
it is time to assemble the block. Being a simple nine patch. there are many ways to assemble the block. I choose to assemble 3 rows of 3 squares .
You need to lay your block out and decide how you want to assemble. As displayed you will notice I wanted my lighter strip facing the the darker center. And wanting the darker side of my HSTs to face the matching darker center. However the layout is up to you!
A moment of caution please take your time assembling your block. As you will noticed I turned one of the stripe blocks upside down. Meaning I had to spend a few moments with Jack the Ripper. And because if use smaller stitches, it takes a little longer and significant more caution when ripping a seam. So take your time and get your sub blocks placed and turned correctly before assembling.
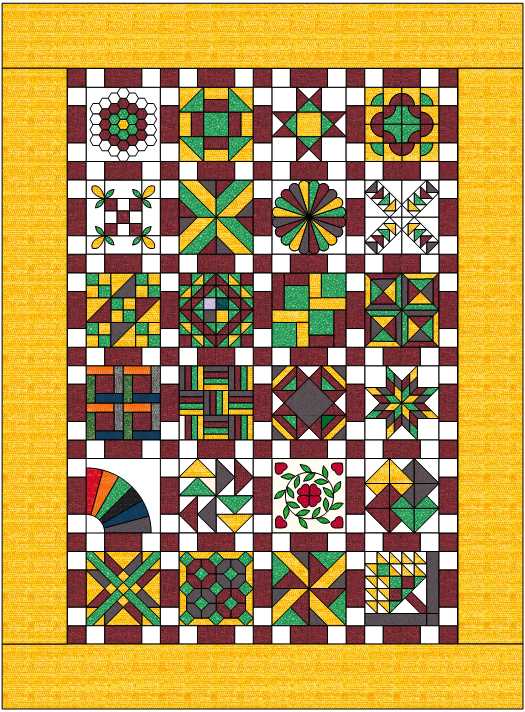
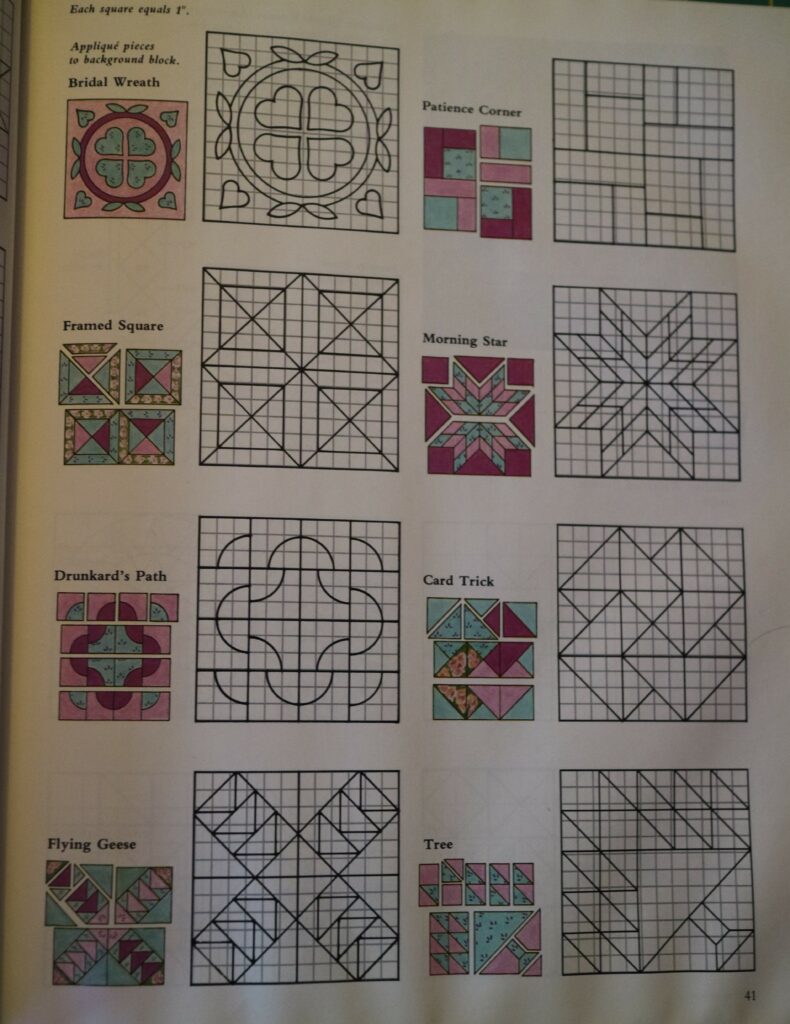
Billie’s Sampler is a 24 Block Sampler from Great American Quilts of 1989 by Sandra L. O’Brien from Oxmoor House.
The blocks are 12×12 inch Finished with a 3 inch wide pieced sashing. The finished side borders are 10 1/2 inch finsihed and the top borders are 7 inches finished. Total finished size is 84×114 inches.
Each block is vintage blocks which carry no copyright. I personally have redrafted the blocks in Electric Quilt 8. Billie Samper Electric Quilt Project File (zip file)
Blogging my journey in recreating this quilt project, I will post 2 blocks per month along with video explaining how and why I choose the process.
Fabric Estimate
Background (white) 3 yards/meters, Color 1 (Yellow) 4 yards/meters, Color 2 (Red) 2 1/2 yards/meters, Color 3 (Green) 2 yards/meters, Color 4 (Grey/Blue) 1 1/2 yard/meter
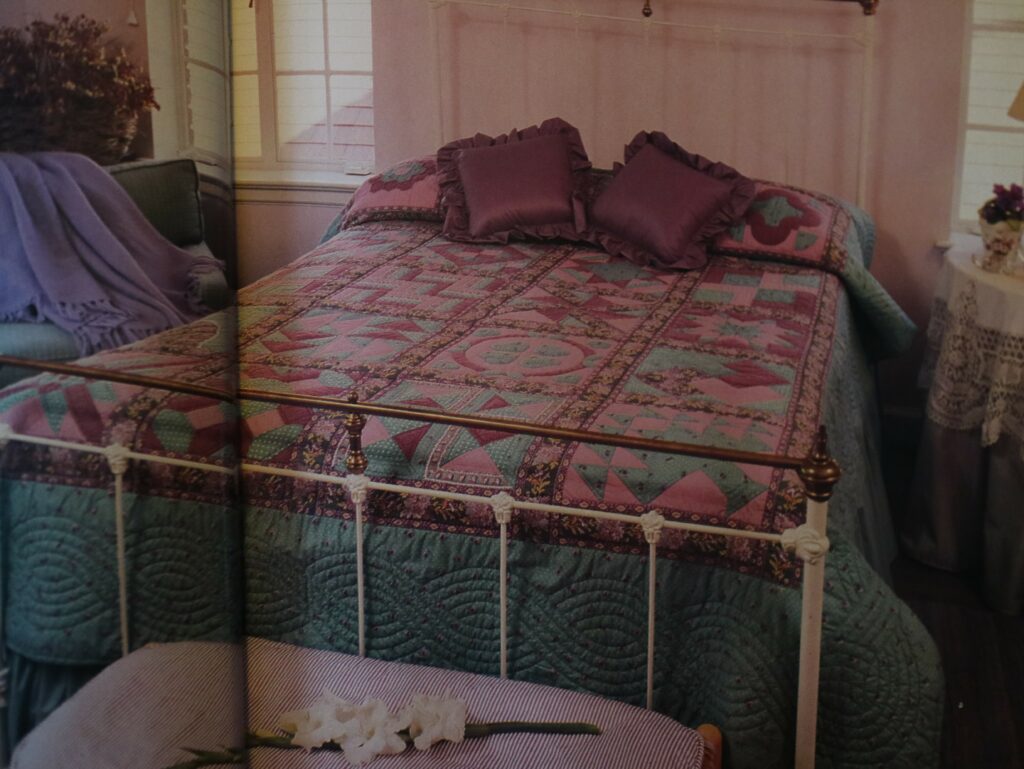
History of Billie’s Sampler
You can almost smell the aroma of budding springtime with looking at Billie’s Sampler quilt./ The floral stripped sashing and small-flowerd prints in warm shades of lilac and green evode a garden rady to burst into bloom. The quilt is a reminder, too, that tradtional blocks lend themselves very well to non traditonal colors.