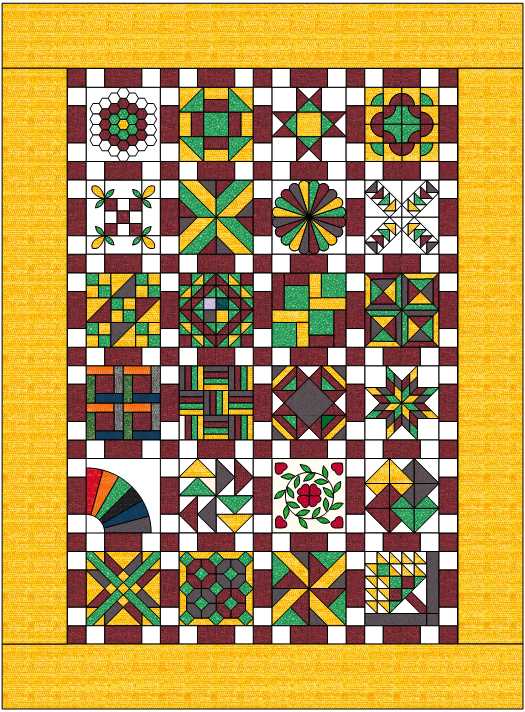
Well the 24 blocks of the sampler is completed. This was interesting sampler
Many of the Blocks were Paper Pieced for simplicity and accuracy. Also many of the blocks were designed to be hand pieced. By machine piecing many of the techniques had to be adapted. There were lots of Partial Seams, Y Seams These techniques are almost impossible using a machine
Like the 45 degree diamonds it is easy to nudge a diamond into position. But using a sewing machine it is impossible to nudge.
So we have learned many new ways of making our blocks. And adapting to changing time.
I have put this project away, into my UFO pile. I lost interest and failed. But I look forward to seeing how you choose to complete the project.
I personally learned I like paper piecing and also have developed a thing for triangles Half and Quarter Square Triangles.
The Blocks
Below is a link to each of the 24 individual blocks.
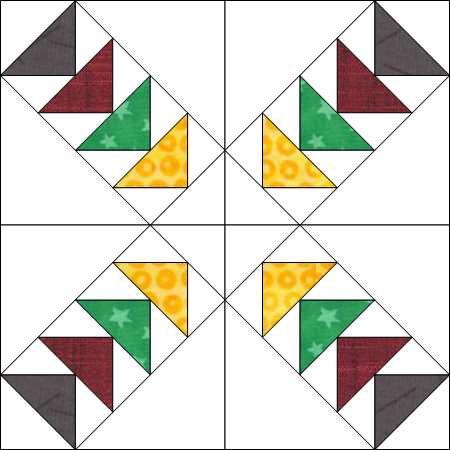
Block 8 Flying Geese was paper pieced. I thought i would be easier to create this block using Foundation Paper Piecing. This block will finish at 12 x 12 inches
The finished block is 12 1/2 x 12 1/2 inches and made up of 4 individual paper pieced blocks of 6 1/2 x 6 1/2 The block uses 4 colors in each sub block with a secondary background fabric. This makes a total of 5 fabric colors.
Cutting
Square 3 1/2 inch (4 Background, 2 x each Fabric (4 Fabric colors in total))
Square 5 1/2 inch 4 x Background Fabric
Square 4 inches 8 x Background Fabric
Half Square Triangles (HSTs) cut 4 squares of background fabric a minimum of 3 inchs. I used 3 1/2 inch for ease of assembly. Now cut these 4 squares corner to corner to create 8 HSTs.
Cut 2 squares each of your four fabrics for the center of the geese. Again cut each square corner to corner to create 4 HSTs of each color. There should be 16 colored HSTs.
Cut 4 squares of background Fabric minimum 5 inches. Again I added 1/2 inch for a 5 1/2 inch square to ease alignment of each piece. Again cut each square corner to corner to create 8 HSTs
Cut 8 squares of background fabric minimum 3 1/4 inches. However I cut mine to 4 inches. again to aid in alignment of piecing. Instead of cutting into HSTs. These 8 Squares will be cut into Quarter Square Triangles (QSTs). this is cutting corner to corner on block sides of the square to create 4 individual triangles per square block. there should be a total of 32 QSTs.
Above is the Cutting instructions to be printed These are exact sizes. (This comes from Electric Quilt 8, each cut includes 1/4 inch seam allowance.) I always increast my size a little and trim down Usually rounded to nearest 1/2 inch and then add 1/2 inch for error.
Above is the foundation paper piecing pattern. Print 4 copies. Please measure to make sure your printer is correct the dashed cutting line should measure 6 1/2 inchs the solid square line should measure 6 inches.
Note: I recently started using a new printer. A Brother. I had to increase my scaling to 103 percent to obtain the correct size. My old HP printer was very accurate. So please check your measurements.
Selecting the 4 HSTs of color fabrics and the Background fabric QSTs
with your FPPing print (making sure it measures 6 1/2″ along th e dotted cut line) Start with the first color fabric and squre to your template. you can start at either end. I usually start at the top in this photo, the long side of the colored geese unit.
Using the background QST units assemble them on each side of your first color HST geese unit. Use standard FPP techniques.
Continue to your second geese unit.
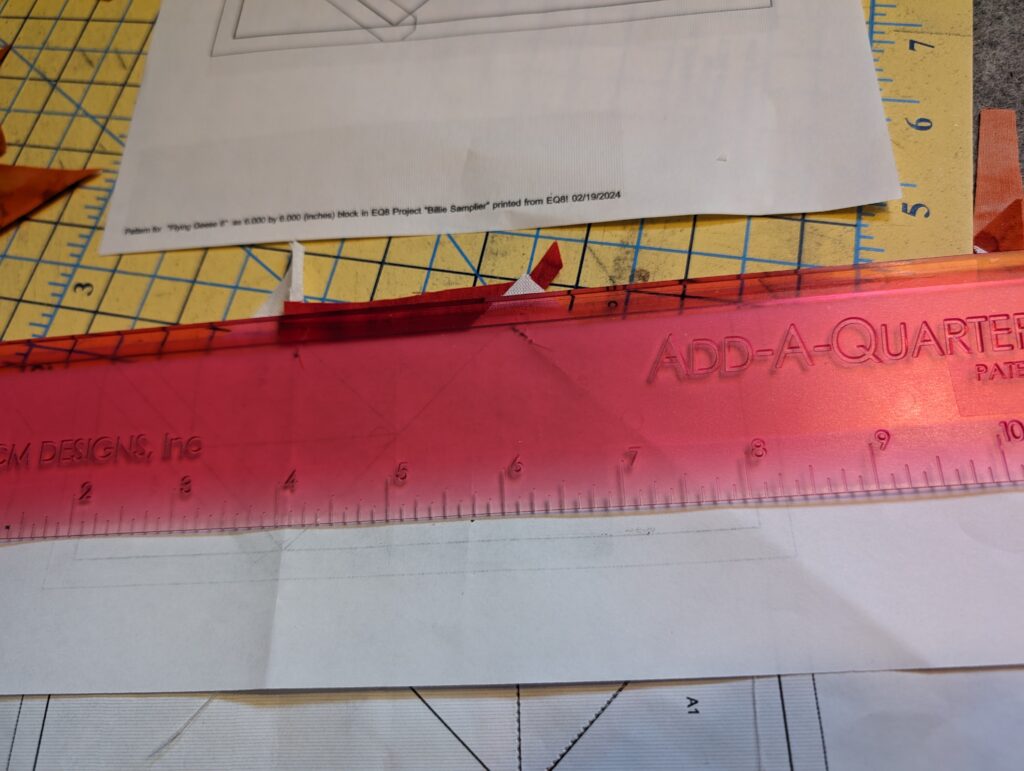
Using an Add A Quarter ruler I trim my edges there will be a little to trim on each piece because I made each of the pieces 1/2″ bigger
once all 4 queese are stitched. Add the smaller background HSTs on each end and now add the larger background HSTs to each side of the unit.
Repeat this to complete the 4 units.
Making sure the 4 units are properly aligned preceed to assemble each of the units
Success your 8th block is complete.
Note: recently i saw an vintage quilt using this block to create a Flying Geese Irish Chain. it was stunning. Make this block has made me appreciate Flying Geese So many options and they are not that difficult with proper cutting and a little patience.