Quilting On A Budget

Tag: grid quilt patterns

Monkey Wrench

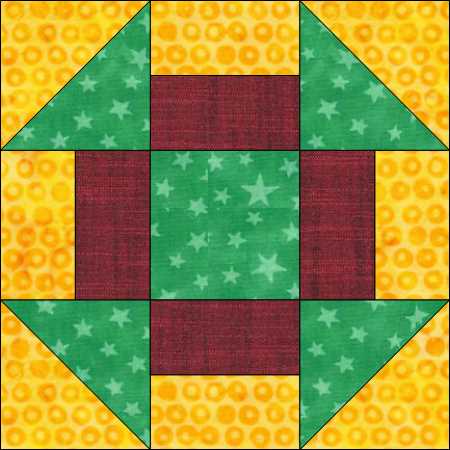
Block 2 – Billie’s Sampler

Monkey Wrench is a simple Nine (9) Patch Pieced Block. The Finished size for all the blocks in the Billie’s Smapler is 12×12″ inches. 

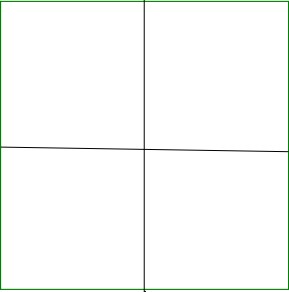
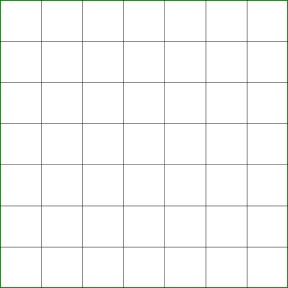
Above is the grid layout for the Monkey Wrench block. Since we are working to create a 12×12″ inch block. Each sub block of this simple nine patch should be a finished 4×4″ inch sub block

Cutting Instructions

1 x 4 1/2 x 4 1/2″ inch Square Dark Fabric

4 x 2 1/2 x 4 1/2″ inch Rectagle Medium Fabric

4 x 2 1/2×4 1/2″ inch Rectable Light Fabric

2 x 4 7/8″ inch Square Dark or Medium Fabric

2 x 4 7/8″ inch Square Light Fabric

Note: I cut my squares for HSTs larger than required and cut down. I cut mine a 5 1/2″ inches and trim

Making Half Square Triangles (HSTs)

First mark the wrong side (or Back) of your light HST fabric with stitch lines. I mark my actual seam lines using a Studio 180 Magic wand. However many choose to mark a line from corner to corner.

Then using Acorn Precision Piecing Seam Align Glue, or other water soluble adhesive, add a few dot down the center corner to corner

Placing your medium/dark and light HST fabric right sides together. using warm iron (no steam) press to dry the glue, holding the two pieces together securely

Now stitch on your stitiching lines (or 1/4″ from center line) on each side of your HST square. 

Note I choose to use a 1.8mm stitch length. Using Amann Mettler Saba 180wt corespun polyester thread. I use this super thin tread with smaller stitch length because there is no thread bulk in my seams. Also I piece using a Organ HLx5 75/11

Note: I use Organ HLx5 needles because they are hardened, with a anti heat and anti glue coatings. This makes these needles last forever, I can easily get up to 6 months of regular piecing with each of the needles. Also, please take my advice these needles are not for the beginner sewist/quilter. The reason is because of the coatings and hardening, when you break one, it can severely knock your machine out of alignment. I have had to take my machine to the dealer/tech a couple times becuase I broke a needle and it moved the needle position or effected the machine timing. 

Futhermore, Schmetz also makes an HLx5 needle. The Schemtz HLx5 version has a ball or dull point, where the Orgran version has a very sharp point which is what I prefer?

Cut your squares corner to corner between your two (2) seams. This will give you 4 HSTs. Press your triangles open to the darker fabric. 

Using 5 1/2″ squares, it is needed to trim your HST squares down to 4 1/2″. I use my Martelli Square Template 4.5″. Align the corner points of template with your seam line. Trim using the edge of the template. This gives you a perfect 4 1/2″ square.

The HSTs step is complete?

Stripe Center Blocks

Taking your 4 Dark and Medium 2 1/2×4 1/2″ rectagles. Stitch each set together on the long side. Again I used Saba 180wt thread with 1.8mm stitch length. Press your 4 squares open to the dark. 

Assembling Block

it is time to assemble the block. Being a simple nine patch. there are many ways to assemble the block. I choose to assemble 3 rows of 3 squares .

You need to lay your block out and decide how you want to assemble. As displayed you will notice I wanted my lighter strip facing the the darker center. And wanting the darker side of my HSTs to face the matching darker center. However the layout is up to you!

A moment of caution please take your time assembling your block. As you will noticed I turned one of the stripe blocks upside down. Meaning I had to spend a few moments with Jack the Ripper. And because if use smaller stitches, it takes a little longer and significant more caution when ripping a seam. So take your time and get your sub blocks placed and turned correctly before assembling. 

Success Block 2 Complete – Monkey Wrench!

Video

Grid Based Patchwork

Drafting Your Own Quilt Patterns

Beginning

I have used this method all my life.  Many wonderful quilt designers use this simple method.  You do not need line by line instructions.  You just need to see or find the underlying grid in the quilt block design.  With this method you can also easily alter size of each complete block by simple changing the underlying sub blocks or squares in the grid.  This makes the math easy.  Remember Quilting is Repeat Repeat and Repeat again.  This method also allows you to decide what size sub blocks or squares you prefer.  Many love 2 inch finished blocks   I actually prefer 3 inch finished blocks.  The quilters I if follow and typically get inspiration usually work with 1 inch sub blocks or squares.  But the sky is the limit

When we draft or use a pre-drafted quilt block design.  The size stated is always finished size of the complete block.  So you must always add another ½” to each block and or sub blocks to account for seam allowance (assuming the standard ¼ inch seam allowance used in quilt patchwork).  

Categories

Let me take a moment to explain the Grid systems that is used in drafting a quilt design.  Most geometric quilt designs used in patchwork fall into a few categories.  These categories are essentially squares divided into smaller squares.  These smaller squares form a grid of 4, 6, 9, 16, 25, 36, 49 and 64 smaller squares.   These Grids usually work in multiple simple Four Patch (4, 16, 36, and 64 smaller squares) and the Nine Patch (9, 36 smaller squares).  But we can also have a combination which uses 25 and 49 squares.    These are just the most common.  But a patchwork block can be made of any number of smaller blocks, and they do not have to be square.  You can also make rectangle block.

Note:  ther e is another group of blocks, which will be covered in a separate post, that are not based on squares.  These blocks are based on lines radiating from the center of the block in equal distances to the edge of the square.  This is the foundation of an eight-pointed star grid. 

Drafting

The secret to drafting a pattern is to recognize which grid your designs align.  And secondly getting the grid to fit the desired finished block size.  Lines of the grid in a design are not always visible.  And many grid based designs have no squares at all in the design.  You must superimpose a grid over the design in your mind. 

Your ability to recognize these categories for designs I share is easier since the designs have the grid overlaid onto the block design.  Even though the grid is overlaid many may find it difficult to draft the design.  You can simply print several copies of your proposed design and then draw the grid lines until you find one that easily overlays or works with the design.

The grids are grouped into 4 separate categories.  A design with a grid based on 4, 16, 64 are based on smaller four patch units.  Those with 9 and 36 squares are based on Nine Patch units.  (however, 36 squares can also be broken into 4 patch units, use which works best for you).  The block design based on 25 smaller squares is based on 5 patch units and 49 smaller squares are based on the 7 Patch unit. 

Creating the Grids

The first step is to decide the finished block size you desire.  However, if your finished blocks size is not flexible, then you may be required to use odd size smaller blocks.  Example using a 9-patch based design.  If you want a 5-inch finished design, you will need to use 1 2/3 inch finished smaller blocks   then need to add ½ for your seam allowance.  See how complicated math can get.  However, if you changed your block size to 6 inches finished you will need to have 2 inch finished smaller blocks which will make your smaller or sub cuts at 2 ½ inches.  Which is significantly easier math.  This is how I make my math easier. 

4 Patch Grids


4 Squares

16 Squares

64 Squares

9 Patch Grids

9 Squares

36 Squares

5 Patch Grid

25 Squares

7 Patch Grid

49 Squares

Now that you understand how to divided your block design into different grids, The math becomes easier.  I personally work with individual square size and not worry about the finished size of my block.

So using 3 inch finished squares, remember you have to add ½ inch for seam allowance.  So you would actually have to cut 3 ½ inch squares.  But the math is much easier.  Using the 4 patch design, the finished bock would be 2 x 3 = 6 inches.  Or 6×6 inch finished block.  Using the 16 patch grid, then you would have 4 x 3 = 12 inches, therefore, you would end up with a 12 inch finished block.

Even with the more difficult blocks like the 49 patch block or 7 patch grid, you would get 7 x 3 = 21.  So you would complete a 21 inch square block finished. 

This method makes math so simple you just need to worry about the induvial size of each block in the grid and then complete the grid.  So the math becomes easy.  However the smaller your individual sub blocks in the grid the more difficult and precise the stitching needs to be  like if you use the 7 Patch grid and want a 7 inch finished block   you would need 1 inch finished sub blocks.  So always add your ½ inch seam allowance so all your cuts would need to be 1 ½ inches. 

Ending Thoughts

The reason I love using 3 inch finished sub blocks or squares, is working with 9 patches, usually my preferred block style.  You have options.  So if you work with 3 inch the math becomes easier.  Like if you want to add dimension to your block, using a 3 inch sub patches in your nine patch which give you a 9 inch finished block.  But you can also easily add a nine patch into one of your 3 inch Sub patches or squares which gives you a nine patch in a nine patch.  You just need 1 inch finished sub blocks.  The match is 3 / 3 = 1    so easy math

Now you can see the endless possibilities.  Each week on Friday I post a little quote and a block made from one of these grids.  You are welcome to use any of these blocks.  They are old vintage blocks with no copyright. So have fun.

Video Overview