Quilting On A Budget

Tag: Paper Piecing

Tree

Block 24 – Billie’s Sampler

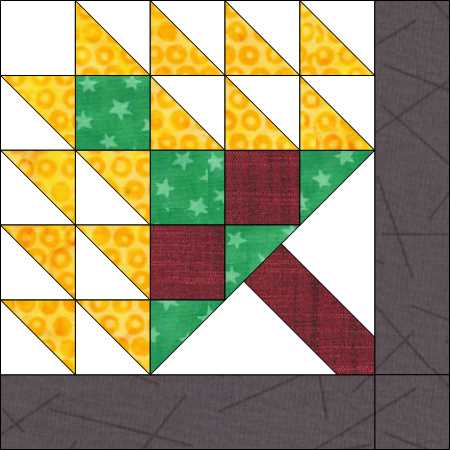
Tree or Tree of Life block is one of my favorite. I again paper pieced as I wanted all my points to be accurate and also discovered Electric Quilt 8 doesn’t like to define cutting instructions for unusual shape pieces with more than 4 sides, I discovered this is a major issue.

Cutting

6 x 2 1/2 x 2 1/2″ squares (I cut mine squares 3″) 1 x Background (White) 2 x color 2 (dark red), 2 x color 3 (orange), 1 x color 4 (dark red)

16 x 2 7/8 x 2 7/8″ squares cut into HSTs (cut mine 3 1/2″). 14 x Background (White) 14 x color 2 (Dark Red) and 2 x color 3 (orange). All the squares should be cut into HSTs, total 32 HSTs.

1 x 6 1/4 x 6 1/4″ square cut into QSTs (cut mine 7″) Background Fabric

2 x 10 1/2 x 2 1/2″ strips (cut mine 11 1/2 x 3 1/2″)

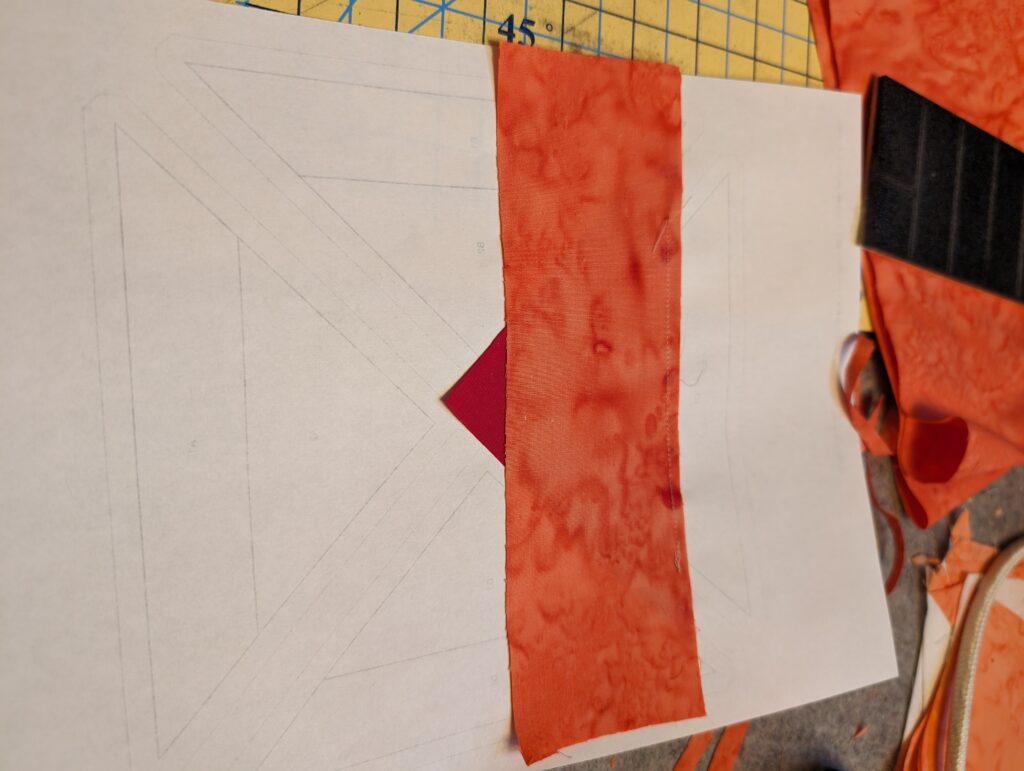
1 strip not defined for stem cut mine 3 1/2″ width of Fat quarter

Assembly

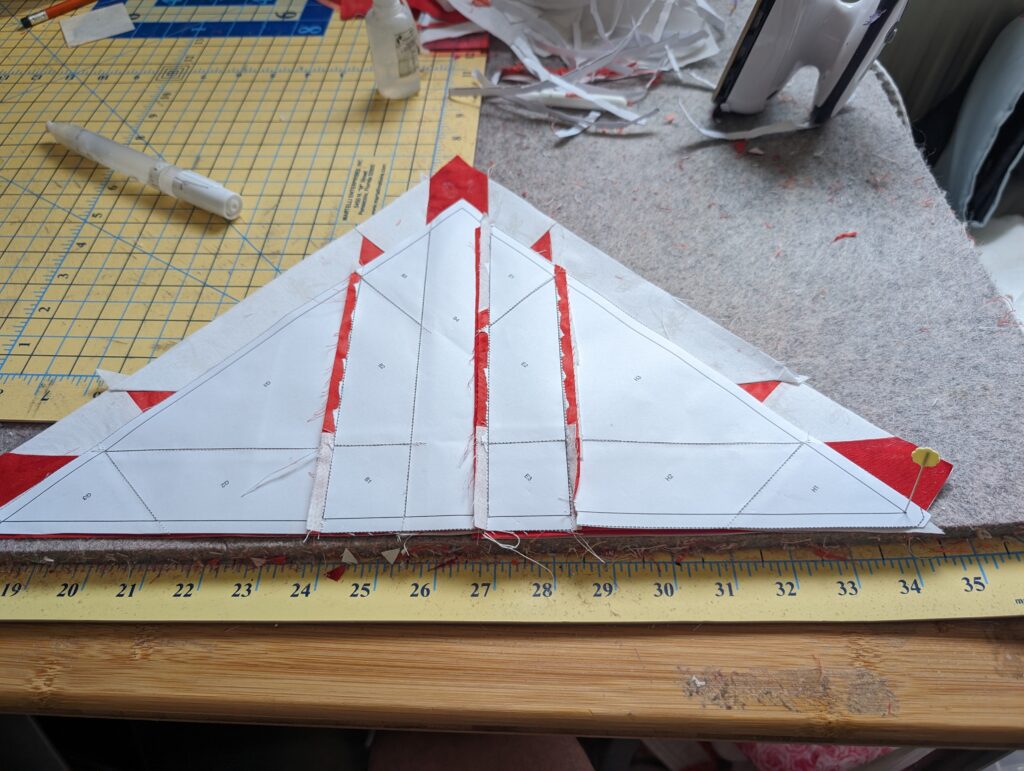
paper piece all the HST strips Note of caution make sure all the HSTs are turned all the correct direction.

paper piece the base triangle.

trim on the cut line on all the sub pieces.

assemble all the sub pieces forming the tree.

Now add the strips on the two sides

Oh My we have completed all 24 blocks in the Billie’s Sampler Amazing and a huge Congrats.

Video

Kansas Dugout

Block 22 – Billie’s Sampler

Kansas Dugout in my opinion was the most difficult block. Let me say there were was some choice words spoken while assembling this block. The entire block was partial and y seams. Not one seam is traditional. But this is a beautiful block and it was a huge learning experience.

Cutting

2 x 2 1/8 x 2 1/8″ square cut background fabric into Half Square Triangles (HSTs) , since I paper pieced this using templates cut the squares 3″ cut into HSTs.

6 x 1 3/4 x 5 15/16″ strips of background fabric, paper piecing size 2 1/2 x 6 1/2″ strips

13 x 2 1/4 x 2 1/4″ squares of mail fabric. paper piecing size is 3″ squares

16 x specialty pieces. 8 second and 8 third fabric colors. I used straps and pasted the pieces to my scraps and cut them out on the cutting line. Note: again some reason Electric Quilt ignored these pieces in the cutting instructions.

Assembly

I paper pieced this block However, each piece is separate. I used scraps, using seam align glue, I attached all the individual pieces to scraps. This block is great for scraps. But it is nothing but partial and y seams. so take your time.

using pins and seam align glue to match the points and then stitching on the stitch lines on the paper templates. Note: since it is possible for the seams not to cross, you much lock the beginning and end of each seam. Also you need to be accurate on the stitch lines. if you stop short of the point then you could have a hole and if you over shot the end would cause a pucker. so take your time and be very very accurate. This block is a great skill builder in accuracy and control of your machine.

added lots of photos of the assembly This is a slow process and requires lots of patience. And lots of colorful adjectives spoken in the assembly, keep easy access to the seam ripper.

Wow Block 22 Kansas Dugout is complete. This block took lots of time and patience. All those Y seams. And must do each and every sub block individually and accurately. I added lots of photos so you can see the slow process. If you find a easier way please share?

Video

Mexican Star

Block 21 – Billie’s Sampler

Mexican Star Block 21 looks simple, but is more complicated than it looks. as the corner strips continue into the center Nine Patch. I tried to make it as a large nine patch but couldn’t work it out because of angles. Therefore, again ended up paper piecing.

Cutting

4 x 2 7/8 x 2 7/8″ square background fabric, cut into Half Square Triangles (HSTs), since paper piecing I cut mine larger. Again rounding to nearest 1/2 plus adding 1/2″ so cut 4 squares 3 1/2″ cut into HSTs

5 x 1 15/16 x 1 15/16 square background fabric. paper piecing cut 2 1/2″ squares

1 x 7 3/16 x 7 3/16″ square background fabric. cut into Quarter Square Triangles (QSTs). paper piecing size 8″ square cut into QSTs

8 x 1 15/16 x 5 1/8″ strips of second and third color. again paper piecing cut 8 strips 2 1/2 x 6″ strips 4 of second color and 4 third color

4 x strips 3″ x 10″ , I cut the strips from a fat quarter narrow width. 18″ Note: there is a error in the cutting instructions from Electric quilt. For some reason it ignored Fabric A .

Above are the templates for the block if you choose to use traditional piecing methods.

Assembly

using traditional paper piecing methods with seam align glue to secure starting pieces.

after finishing all the individual pieces. it is time to assemble the block.

wow congratulations. Block 21 – Mexican Star. This block went together rather quickly since I paper pieced it. I tried traditional piecing methods but it failed. Paper Piecing really make this block a great deal easier to assemble.

Video

Card Trick

Block 20 – Billie’s Sampler

Card Trick Block 20 Billie’s Sampler. This is a interesting block. I paper pieced this block to keep my colors and point accurate.

Cutting

Follow the cutting, it is very unique as you need so many different triangles, I cut my blocks to make the triangles rounded to nearest 1/2″ plus 1/2″ for overlap. There is also Part 1 and Part 2 of the paper piecing pattern. This is so that it fits on A4 or Letter size paper. each paper piecing template should be 4 1/2 inches wide.

I used my Martelli Templates to cut my squares to make my triangles. Some are Half Square and others are Quarter Square. i used the 5.5 inch template for the Half Square Triangles and 6.5 template for the quarter square triangle.

using standard paper piecing techniques assemble your block. it goes together really quickly.

Wow we just finished Block 20 Billie’s Sampler Card Trick. Almost to the finish line

Video

Dutchman’s Puzzle

Block 18 – Billie’s Sampler

Dutchman’s Puzzle Block 18 Billie’s Sampler. This is a simple fun fast block. There are so so many ways to make Flying Geese sub blocks. However, I paper pieced mine. As I wanted my point to be perfect and accurate.

Cutting

8 x 3 7/8 x 3 7/8″ squares of background fabric. Cut all 8 squares into Half Square Triangles. (Note: I cut my square 4 1/2 inches)

2 x 7 3/16 x 7 3/16″ squares, cut both squares into Quarter Square Triangles (QSTs) (Note: I cut my squares 8 1/2 inchs. and only used 2 colors. Therefore, only needed 2 squares as you only need 8 QSTs for this block. if you choose to use more colors then adjust accordingly.)

I found it much easier and faster to simply paper piece. You will need 4 of these paper piecing templates and while printing each should measure 6 1/2″ square.

Assembly

Using seam align glue. Start with a QST and secure. then add a HST on each side using standard paper piecing methods. since I cut my pieces a little too large then alignment was fast and easy. then proceed to the QST 2. Now repeast for the 4 units.

now that all 4 units are complete, Trim on the cutting lines of your paper piecing templates.

Using standard methods assemble as a 4 patch Note of caution to keep your pieces turned correctly to form the puzzle design.

Congrats – Block 18 Dutchman’s Puzzle is now complete.

Video

Grandmother’s Fan

Block 17 – Billie’s Sampler

This is a fast and easy pieced applique block. was fun to make. Grandmother’s Fan block 17.

Cutting

1 x 12 1/2 x 12 1/2″ inch square background fabric

6 x blades using colors of your choice cut using the templates below.

Assembly

I cut my 6 blades using the templates in the PDF. Using seam align glue secure the templates to your fabric. I used scraps from previous blocks.

I assembled my blades one at time. wanting to keep my color order correct and for accuracy. using seam align glue again with pins align each of your blades in the proper order. The stitching line on the template helps with accuracy.

after assembling all 6 blades. and pressing properly.

wanting a smooth edge, I decided to turn my edges. Using a piece of waster soluble mesh stabilizer. laying on top and stitching a 1/4 seam on the stop and bottom curve of the fan.

Trim excessive stabilizer away

because both sides are left open. Turning was no issue. it was fast and easy.

using low heat on your iron press your fan smooth. Be careful that your iron is not too hot as it can melt the stabilizer on the back. Because you used water soluble you do not need to remove the stabilizer. This gives you are good clean perfect edge to applique your fan to the background square.

I used my Elmer’s Purple glue stick to secure my fan to the background. it is easy to align just align so that the two sides are even with the edges of the 12 1/2 inch background square.

I used a special applique stitch. A modified blanket stitch. which is 0,8 mm wide by 1.0 mm length with a Balance adjusted to +20 This makes the blanket stitch look very similar to a blind hem but with only one stitch forward. Also this allows me to use my straight stitch 1/4″ foot and plate on my sewing machine. (Note I use a Bernina) This method also worked on my Pfaff but had to use my 9mm stitch plate because the machine automatically recognized my stitch plate

I also had a Janome. I could not just adjust the stitch like the Bernina and Pfaff as my Janome didn’t have balance setting for the stitches. However I could make the stitch in the Horizon Link Stitch Composer. (Note: my Janome was a Horizon Memory Craft 12000)

Success – Block 17 is complete

Video

Night and Noon

Block 15 – Billie’s Sampler

Night and Noon is a nine patch based block. Also a variation on the Ohio Star The corner blocks are angled strips and the center blocks are Quarter Square Triangles (QST). However, I paper pieced this blocks because wanted my angles and points to be perfect.

Cutting

Need 4 Fabric Colors and a background Fabric

4 x 4 inch square minimum. 2 x colorway 1 and 2 x colorway 2. Now cut squares corner to corner making a total 8 half square triangles (HSTs). Note: when I paper piece I make my pieces a little larger so I would cut my squares at 4 1/2 inches.

8 x 1 1/2 x 7 inch strips 4 x colorway 3 and 4 x colorway 4. Again I would cut my strips a little larger like 2 x 7 1/2 inches

2 x 5 1/4 x 5 1/4 inches square. 1 x colorway 4 and 1 square background. Cut square in to 4 x QSTs for each square making 8 triangles. And once again, would cut a little larger so I would make 5 1/2 x 5 1/2 inch square.

1 x 6 1/4 x 6 1/4 inch square. This is your center block, I choose colorway 4.

Assembly

Paper Piecing each of the corner blocks I assembled starting with one of the middle strips of the corner square block.

once all the corner units are pieced it is time to assemble the entire unit. I assembled my pieces by working around the center block by sewing opposites sides first to the center and then adding the other two sides.

Success Block 15 – Night and Noon is complete!!!

Video

Framed Square

Block 12 – Billie’s Sampler

Framed Square – Block 12 Billie’s Sampler. Unique but simple. There are several ways to make this block. I chose to Foundation Paper Piece (FPP), wanting to get all the miter angles to align perfectly. Another way is to use simple Quarter Square Triangles (QSTs) with sashing. You can add sashing without the miter. or the with the miter the choice is up to you. this block is 12 1/2 x 12 1/2″ with 4 x 6 1/2″ sub blocks.

Documents

The sizes are exact. No room for any mistake or complication. Because I FPP i cut my pieces a little big. (Note: Need to learn to check the round to 1/8″ in the printing with Electric Quilt 8). Cutting HSTs should be 3 3/4″ square, QSTs should be 5 1/4″ and the strips should be 1 1/2 x 7 1/4″

Templates for perfect piecing

Print four copies. each side should measure 6 1/2″.

Cutting

  • 4 x 6″ square, 1 of each color (cut into QSTs)
  • 2 x 2 1/2″ strips width of Fat Quarter (each of all 4 colors).

Assembly

secure center QST to FPP template. add 2 1/2″ strip . stitch on line, I used a 1.8mm straight stitch using 150wt core-spun polyester thread (Amann Metter Saba)

Press open to the strip side. I used Acorn Easy Pressing solution pen for flat seams

Trim the QST pieces on the dotted cut line.

Repeat, there should be 4 sets of QSTs.

Assembly as 4 patch, be cautious to match all the seams and corners.

Finish assembling your QSTs into squares. 6 1/2 x 6 1/2″ Using magic pins (note these pins bend easily), Acorn seam align glue each piece was perfectly secure for stitching.

Assemble the 4 x 6 1/2 x 6 1/2″ sub blocks into a single 4 patch 12 1/2 x 12 1/2″ block.

Success! Block 12 Billie’s Sampler is complete, and double you have now completed 1/2 of the 24 blocks in the project. Congratulations.

Video