Quilting On A Budget

Tag: quilt (Page 1 of 19)

Grandma’s Flower Garden

Billie’s Sampler – Block 1

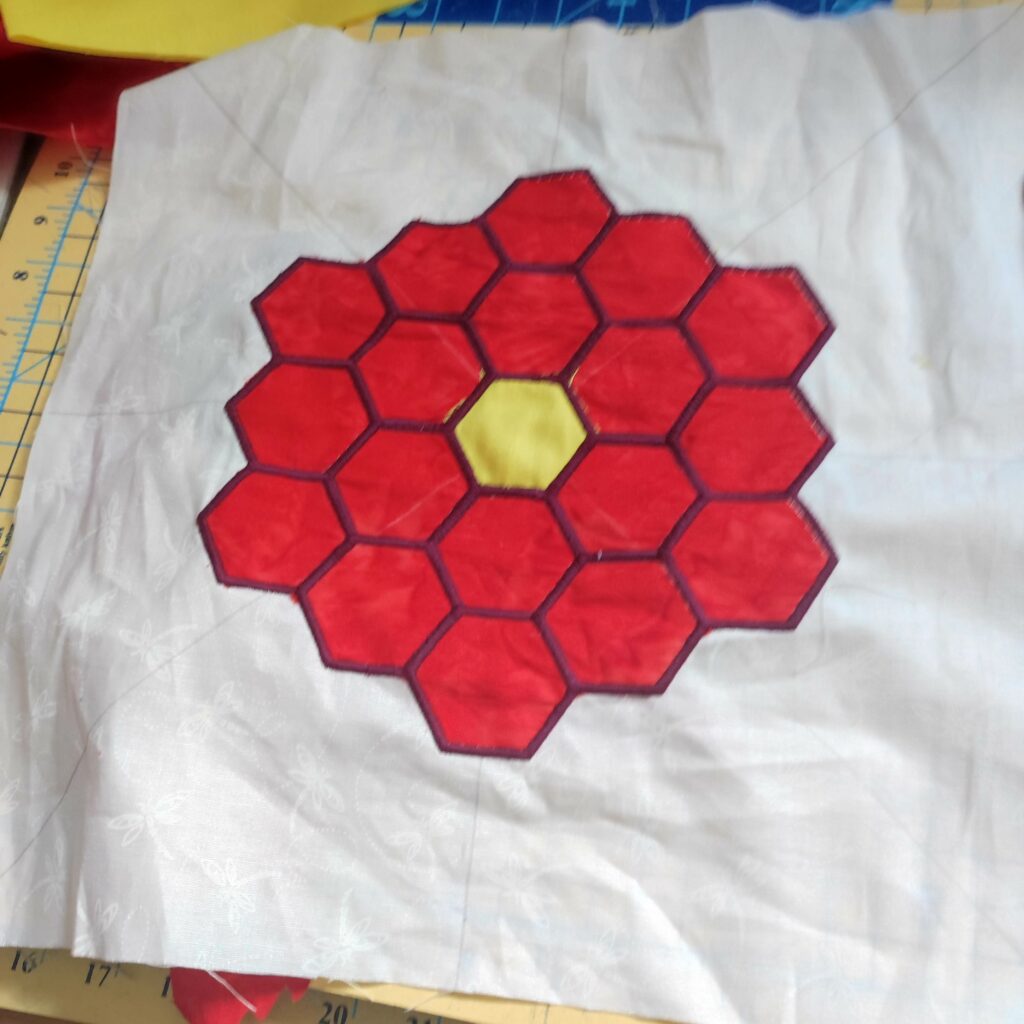
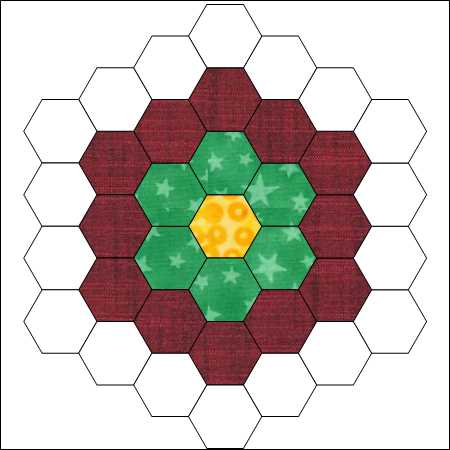
Grandma’s Flower Garden Block is old basic Hexagon design. This block can be Pieced, English Paper Pieced or Appliqued. The applique method depends on your personal style. You can use Raw Edge, Turned Edge, or like I, Satin Stitch. 

But a note about the satin stitches. I will not use this method again. It took me three (3) days of stitching to finish this simple block. One (1) day cutting hexagons and stitching each down on my 12 1/2 x 12 1/2 backgroud block. And two (2) days to acutually stitch all the satin stitches. However, I never do myself any favors. I manually tapered each point on every hexagon. What fun. My Bernina B590 does not offer tapering. However my Pfaff Creative Sensation does have this feature, which would have made my life so much easier. So suggested do not try this unless your machine has a tapering feature. Just for Sanity!

Working with Hexagons

Talk about teaching a old dog new tricks. I learned something new working with the hexagons in this project. 

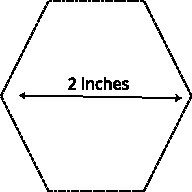
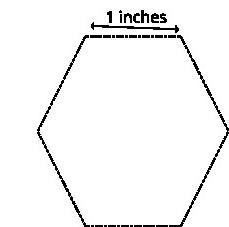
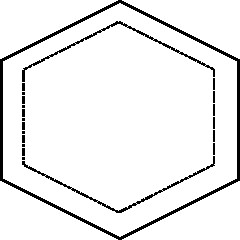
I was always taught that a Hexagon is measured by using its diameter. Point to point. So in this block you would use 2 inch finsihed hexagons. However in quilting a hexagon is measured by one side. Thus getting a 1 inch finished hexagon. Always something new.

Piecing Hexagons

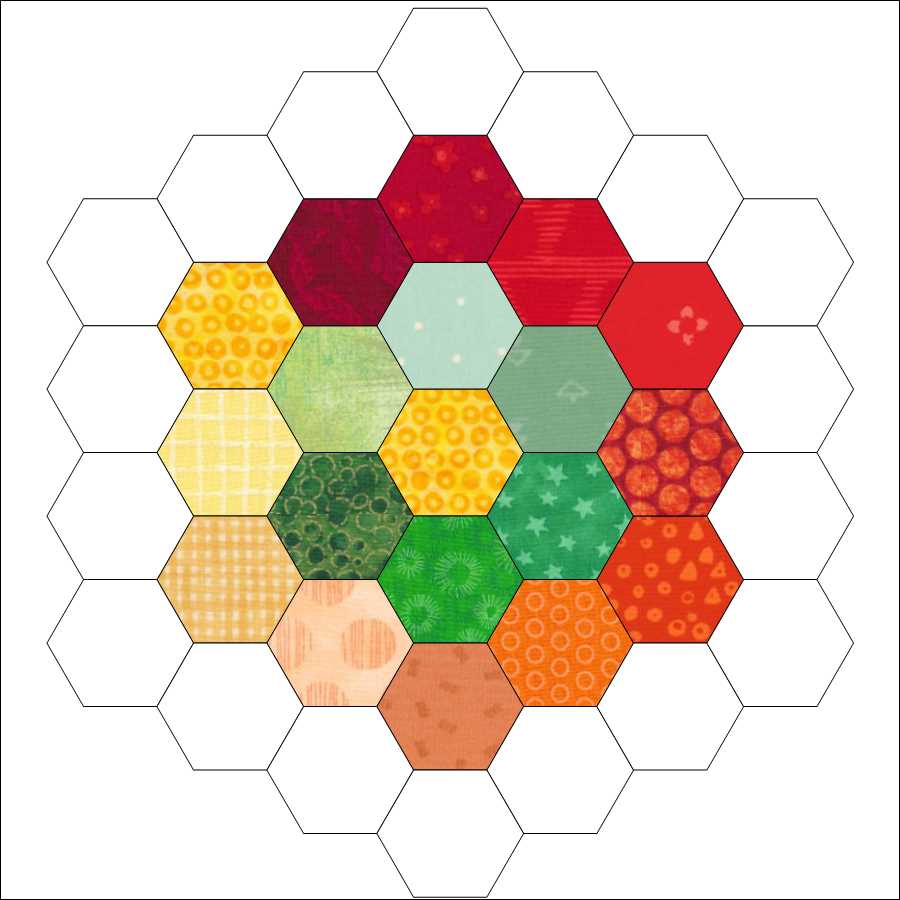
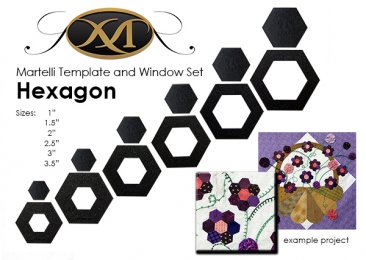
If you choose to piece the hexagons, then you would need to cut 19 – 1 1/2″ inch hexagons for this block. It must be noted that when piecing hexagons you do not want to stitch from edge to edge. The reason is the stitch crossing all the different corners causes little bumps in your block. Therefore, you always piece a hexagon starting 1/4″ from the edge and stopping 1/4″ before the ending edge. This why so many hand piece. However, with many modern machines you can create a program stitch that is 1″ long or 25mm to 25.5mm long swam (1″ equals 25.4mm). You can even program locking stitches. On my Bernina this procedure is called Stitch Recorder, On my Pfaff called Stitch Program My old Janome MC 12000 would automaticlly ask if I wanted to repeat the stitch sequence that was just completed, this popup showed when using the piecing function in the T-shirt menu. 

Notice the inside stitching line in the imagine above. To make this process easier, I would mark my seam lines. Using Martellie Hexagon Templates use the 1 1/2″ hexagon template to cut the 19 hexagons. Then using the 1″ hexagon placing in the center of the cut 1 1/2″ hexagon piece, using pencil or other marking tool, mark the seam allowance, using the edge of the 1″ hexagon template. You can also use a Studio 180 Magic Wand or any other tool that helps you to mark a 1/4″ seam allowance.

Satin Stitch Applique

I choose to use Satin Stitch applique. Using the same method with Turned or Raw Edge, minus satin stitching around each seam.

First cutting 19 – 1″ inch hexagons, I used Martelli Heagon Templates. Also need to cut 12 1/2 x 12 1/2 inch background square. Locate the center of the background square. Note the pencil lines from corner to corner and middle to middle on the image below. Gluing your center hexagon to the center of the square Then glue each round of hexigons. for a total of two (2) rounds. I used Acorn Precision Piecing Seam Align Glue, however, it is okay to use Elmer’s or any other Water Soluble glue for this step. 

After the glue is set, either by drying or pressing with a warm iron. Using a small zigzag stitch, I used 3mm wide by 2mm lengh. Using your stitch in the ditch (edge stitch) foot (#10 Bernina Foot), stitch around all the edges of your hexagons. The blade of your foot can follow the space around each hexagon. (Thus you have 1.5mm on each hexagon). This secures yours hexagon pieces to your background fabric. 

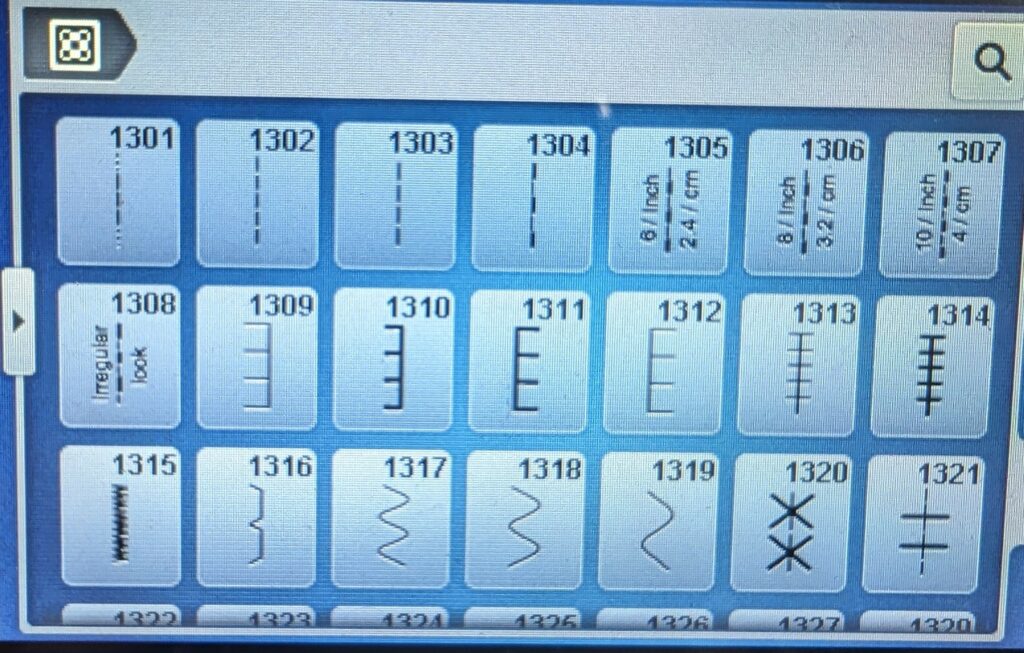
Note, if you choose the Raw edge method, then it may be better to increase the width of your zigzag to 4mm or 5mm. Also you can use a blacket stitch or double blanket stitch for this method (Blanket Stitch1309 and Double Blanket Stitch 1313, This stitches my be differrent on your machine). By choosing Turned edge, then may want to decrease your stitch width for a more invisible stitch. 

Statin Stitching

Choosing a tapered statin stitch was a difficult choice. Wanting to make the design look more like a flower bloom and each heagon as a single petal. Adding two (2) layers of tear away stablizer. Also used used a tapered 4mm statin stitch, using Amann Mettler Saba 80 weight, corespun polyester thread. 

Well this was a interesting block and first step in creating the Billie Sampler. Loved the choosen method in theory. However, time and end results where not exactly what was intended. Will I redo the block no! Will I choose this method again NO!

Video

Grid Based Patchwork

Drafting Your Own Quilt Patterns

Beginning

I have used this method all my life.  Many wonderful quilt designers use this simple method.  You do not need line by line instructions.  You just need to see or find the underlying grid in the quilt block design.  With this method you can also easily alter size of each complete block by simple changing the underlying sub blocks or squares in the grid.  This makes the math easy.  Remember Quilting is Repeat Repeat and Repeat again.  This method also allows you to decide what size sub blocks or squares you prefer.  Many love 2 inch finished blocks   I actually prefer 3 inch finished blocks.  The quilters I if follow and typically get inspiration usually work with 1 inch sub blocks or squares.  But the sky is the limit

When we draft or use a pre-drafted quilt block design.  The size stated is always finished size of the complete block.  So you must always add another ½” to each block and or sub blocks to account for seam allowance (assuming the standard ¼ inch seam allowance used in quilt patchwork).  

Categories

Let me take a moment to explain the Grid systems that is used in drafting a quilt design.  Most geometric quilt designs used in patchwork fall into a few categories.  These categories are essentially squares divided into smaller squares.  These smaller squares form a grid of 4, 6, 9, 16, 25, 36, 49 and 64 smaller squares.   These Grids usually work in multiple simple Four Patch (4, 16, 36, and 64 smaller squares) and the Nine Patch (9, 36 smaller squares).  But we can also have a combination which uses 25 and 49 squares.    These are just the most common.  But a patchwork block can be made of any number of smaller blocks, and they do not have to be square.  You can also make rectangle block.

Note:  ther e is another group of blocks, which will be covered in a separate post, that are not based on squares.  These blocks are based on lines radiating from the center of the block in equal distances to the edge of the square.  This is the foundation of an eight-pointed star grid. 

Drafting

The secret to drafting a pattern is to recognize which grid your designs align.  And secondly getting the grid to fit the desired finished block size.  Lines of the grid in a design are not always visible.  And many grid based designs have no squares at all in the design.  You must superimpose a grid over the design in your mind. 

Your ability to recognize these categories for designs I share is easier since the designs have the grid overlaid onto the block design.  Even though the grid is overlaid many may find it difficult to draft the design.  You can simply print several copies of your proposed design and then draw the grid lines until you find one that easily overlays or works with the design.

The grids are grouped into 4 separate categories.  A design with a grid based on 4, 16, 64 are based on smaller four patch units.  Those with 9 and 36 squares are based on Nine Patch units.  (however, 36 squares can also be broken into 4 patch units, use which works best for you).  The block design based on 25 smaller squares is based on 5 patch units and 49 smaller squares are based on the 7 Patch unit. 

Creating the Grids

The first step is to decide the finished block size you desire.  However, if your finished blocks size is not flexible, then you may be required to use odd size smaller blocks.  Example using a 9-patch based design.  If you want a 5-inch finished design, you will need to use 1 2/3 inch finished smaller blocks   then need to add ½ for your seam allowance.  See how complicated math can get.  However, if you changed your block size to 6 inches finished you will need to have 2 inch finished smaller blocks which will make your smaller or sub cuts at 2 ½ inches.  Which is significantly easier math.  This is how I make my math easier. 

4 Patch Grids


4 Squares

16 Squares

64 Squares

9 Patch Grids

9 Squares

36 Squares

5 Patch Grid

25 Squares

7 Patch Grid

49 Squares

Now that you understand how to divided your block design into different grids, The math becomes easier.  I personally work with individual square size and not worry about the finished size of my block.

So using 3 inch finished squares, remember you have to add ½ inch for seam allowance.  So you would actually have to cut 3 ½ inch squares.  But the math is much easier.  Using the 4 patch design, the finished bock would be 2 x 3 = 6 inches.  Or 6×6 inch finished block.  Using the 16 patch grid, then you would have 4 x 3 = 12 inches, therefore, you would end up with a 12 inch finished block.

Even with the more difficult blocks like the 49 patch block or 7 patch grid, you would get 7 x 3 = 21.  So you would complete a 21 inch square block finished. 

This method makes math so simple you just need to worry about the induvial size of each block in the grid and then complete the grid.  So the math becomes easy.  However the smaller your individual sub blocks in the grid the more difficult and precise the stitching needs to be  like if you use the 7 Patch grid and want a 7 inch finished block   you would need 1 inch finished sub blocks.  So always add your ½ inch seam allowance so all your cuts would need to be 1 ½ inches. 

Ending Thoughts

The reason I love using 3 inch finished sub blocks or squares, is working with 9 patches, usually my preferred block style.  You have options.  So if you work with 3 inch the math becomes easier.  Like if you want to add dimension to your block, using a 3 inch sub patches in your nine patch which give you a 9 inch finished block.  But you can also easily add a nine patch into one of your 3 inch Sub patches or squares which gives you a nine patch in a nine patch.  You just need 1 inch finished sub blocks.  The match is 3 / 3 = 1    so easy math

Now you can see the endless possibilities.  Each week on Friday I post a little quote and a block made from one of these grids.  You are welcome to use any of these blocks.  They are old vintage blocks with no copyright. So have fun.

Video Overview

Today you are you! That is truer than true! There is no one alive who is you-er than you!

#DrSeuss #FridayQuote

#QuiltBlock – Ribbon Quilt by Nancy Cabot – 1657 in #BabraraBrackman #EncyclopediaOfPiecedQuiltPatterns

#Patchwork #Piecing #Quilt #Quilting #HunterDeuling #QOAB #QuiltingOnABudget

If you think only of evil, then you become pessimistic and hopeless like Freud. But if you think there is no evil, then you’re just one more deluded Pollyanna.

#AbrahamMaslow #FridayQuote

#QuiltBlock – True Blue from Hearth and Home – 1656 in #BarbaraBrackman #EncyclopediaOfPiecedQuiltPatterns

#Patchwork #Piecing #Quilt #Quilting #HunterDeuling #QOAB #QuiltingOnABudget

It has been said that time heals all wounds. I don’t agree. The wounds remain. Time – the mind, protecting its sanity – covers them with some scar tissue and the pain lessens, but it is never gone.

#RoseKennedy #FridayQuote

#QuiltBlock – Cross and Chain by Nancy Cabot circa 1928 – 1655 in #BabraraBrackman #EncyclopediaOfPiecedQuiltPatterns

#Patchwork #Piecing #Quilt #Quilting #HunterDeuling #QOAB #QuiltingOnABudget

Love and compassion are necessities, not luxuries. Without them humanity cannot survive.

#DalaiLama #FridayQuote

#QuiltBlock – Pin Wheel from 1930s #KCStar – 1654 in #BarbaraBrackman #EncylopediaOfPiecedQuiltPatterns

#Patchwork #Piecing #Quilt #Quilting #HunterDeuling #QOAB #QuiltingOnABudget

Want to wish everyone a wonderful and safe #Koningsdag (King’s Day).

#Quilt Block – King’s Crown from #ElectricQuilt8 #BlockLibrary.

#Patchwork #Piecing #Quilt #Quilting #HunterDeuling #QOAB #QuiltingOnABudget

« Older posts